Counterparties
Create and manage beneficiaries, edit counterparty details, organize counterparties into groups, and handle approval workflows
Introduction
The Counterparties feature provides comprehensive management of all beneficiaries and payment recipients within LYNKS, enabling users to create, edit, approve, and organize counterparty information for accurate and compliant payment processing. This interface consolidates counterparty data, manages approval workflows, and provides flexible organization through counterparty groups.
By maintaining accurate counterparty information and following approval processes, organizations ensure payment accuracy, maintain compliance with internal controls, and prevent errors in payment execution through verified and approved beneficiary data.
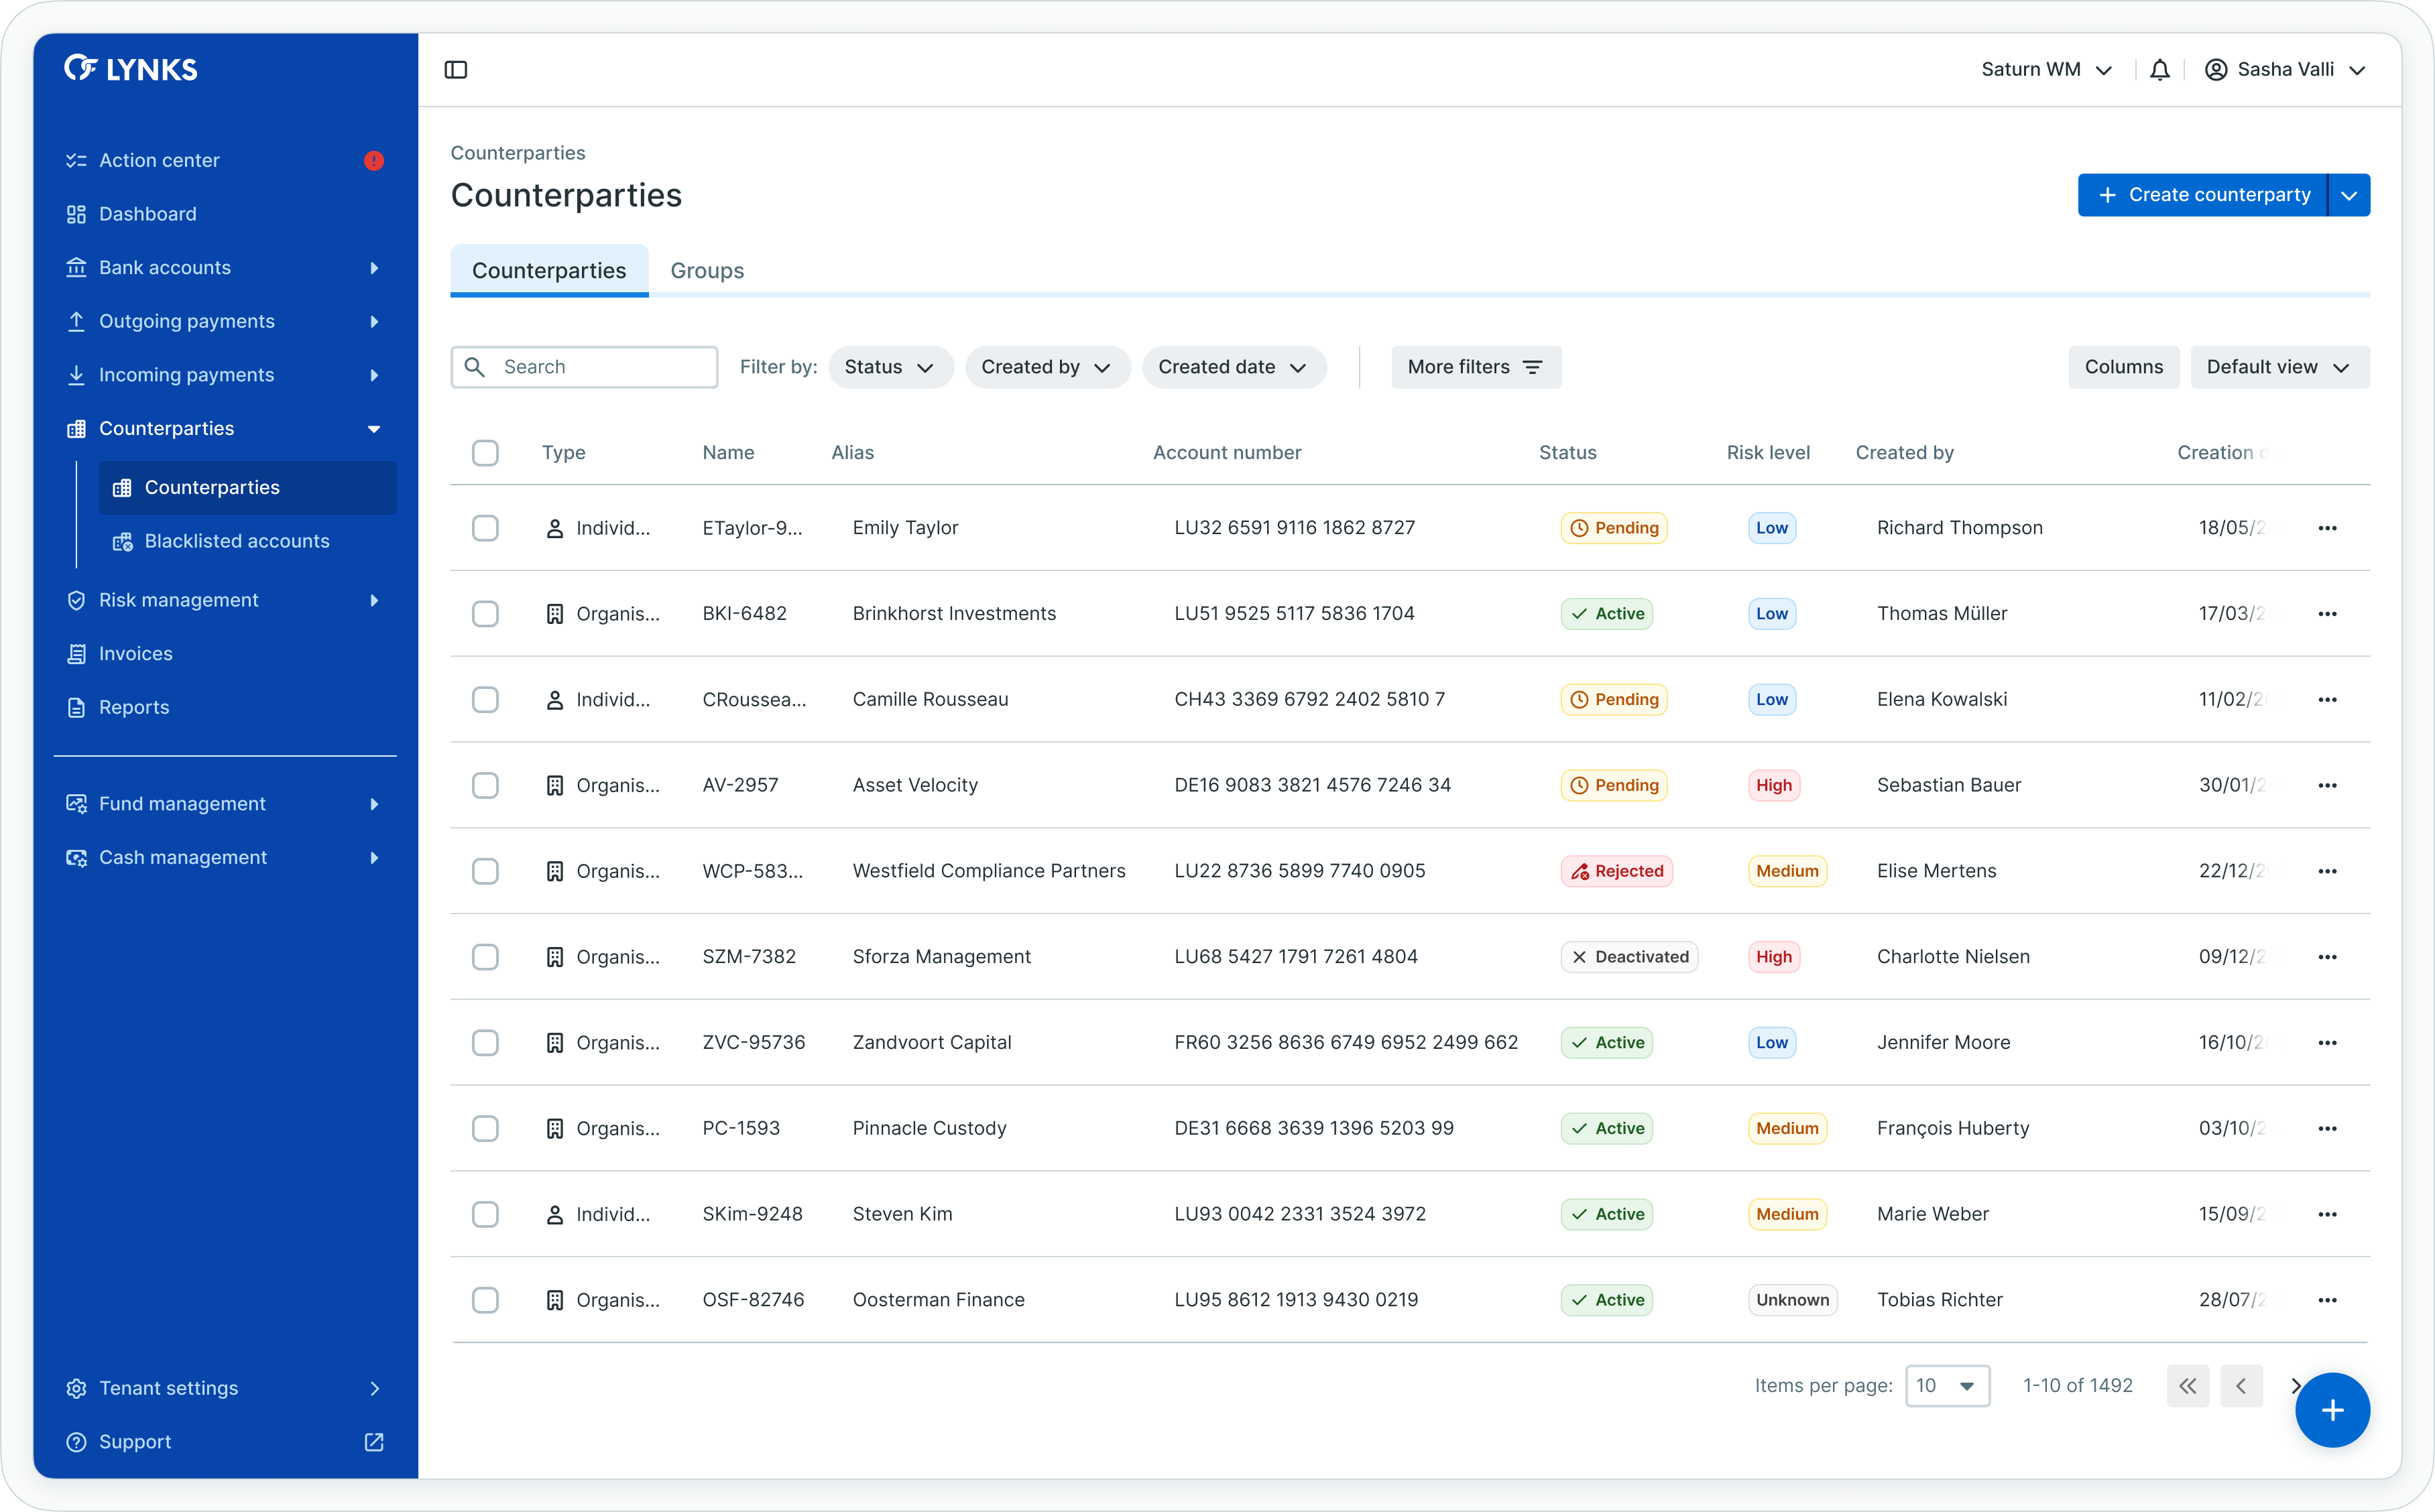
Counterparties list view
Prerequisites
Users must have the appropriate permissions to view and manage counterparties. The interface displays only counterparties you have access rights to view or manage.
Permissions
| Permission | Description |
|---|---|
COUNTERPARTY_ACCOUNT_READ | View counterparty list, details, and associated information |
COUNTERPARTY_ACCOUNT_WRITE | Create, edit, and resubmit counterparties |
COUNTERPARTY_ACCOUNT_AUTHORISE | Approve counterparties following four-eyes principle |
COUNTERPARTY_ACCOUNT_DEACTIVATE | Deactivate counterparties to prevent their use in payments |
COUNTERPARTY_ACCOUNT_SKIP_4EYES | Skip approval process for counterparty changes |
Counterparty scopingUsers see only counterparties they have been granted access to through their permission configuration. Counterparty visibility respects data scoping for segregation and access control.
Four-eyes principleCounterparty approvals follow the four-eyes principle, requiring authorization from a user other than the one who created or modified the counterparty record.
Counterparties overview
Counterparties represent all beneficiaries and payment recipients configured within LYNKS, containing the account information necessary to execute credit transfers. Each counterparty stores beneficiary account details, risk assessment information, and optional documentation supporting the business relationship.
Counterparty types
LYNKS supports different counterparty types:
| Type | Description |
|---|---|
| Individual | Natural persons as payment beneficiaries with personal account information |
| Organization | Legal entities including companies, institutions, or other organizations as beneficiaries |
Counterparty lifecycle
Counterparties progress through defined stages:
- Creation - Counterparty created manually, through payment creation, or via bulk import
- Approval - Collection of required authorization following four-eyes principle
- Active - Approved counterparty available for use in payments
- Deactivation - Counterparty disabled, preventing use in new payments
Creating counterparties
LYNKS provides multiple methods for creating counterparties, enabling users to add individual beneficiaries, organizations, or import multiple counterparties simultaneously through file upload.
Initiating counterparty creation
To begin creating a counterparty:
- Locate the floating action button (+) in the bottom right corner of the screen
- Click the (+) button to open the creation menu
- Select New counterparty
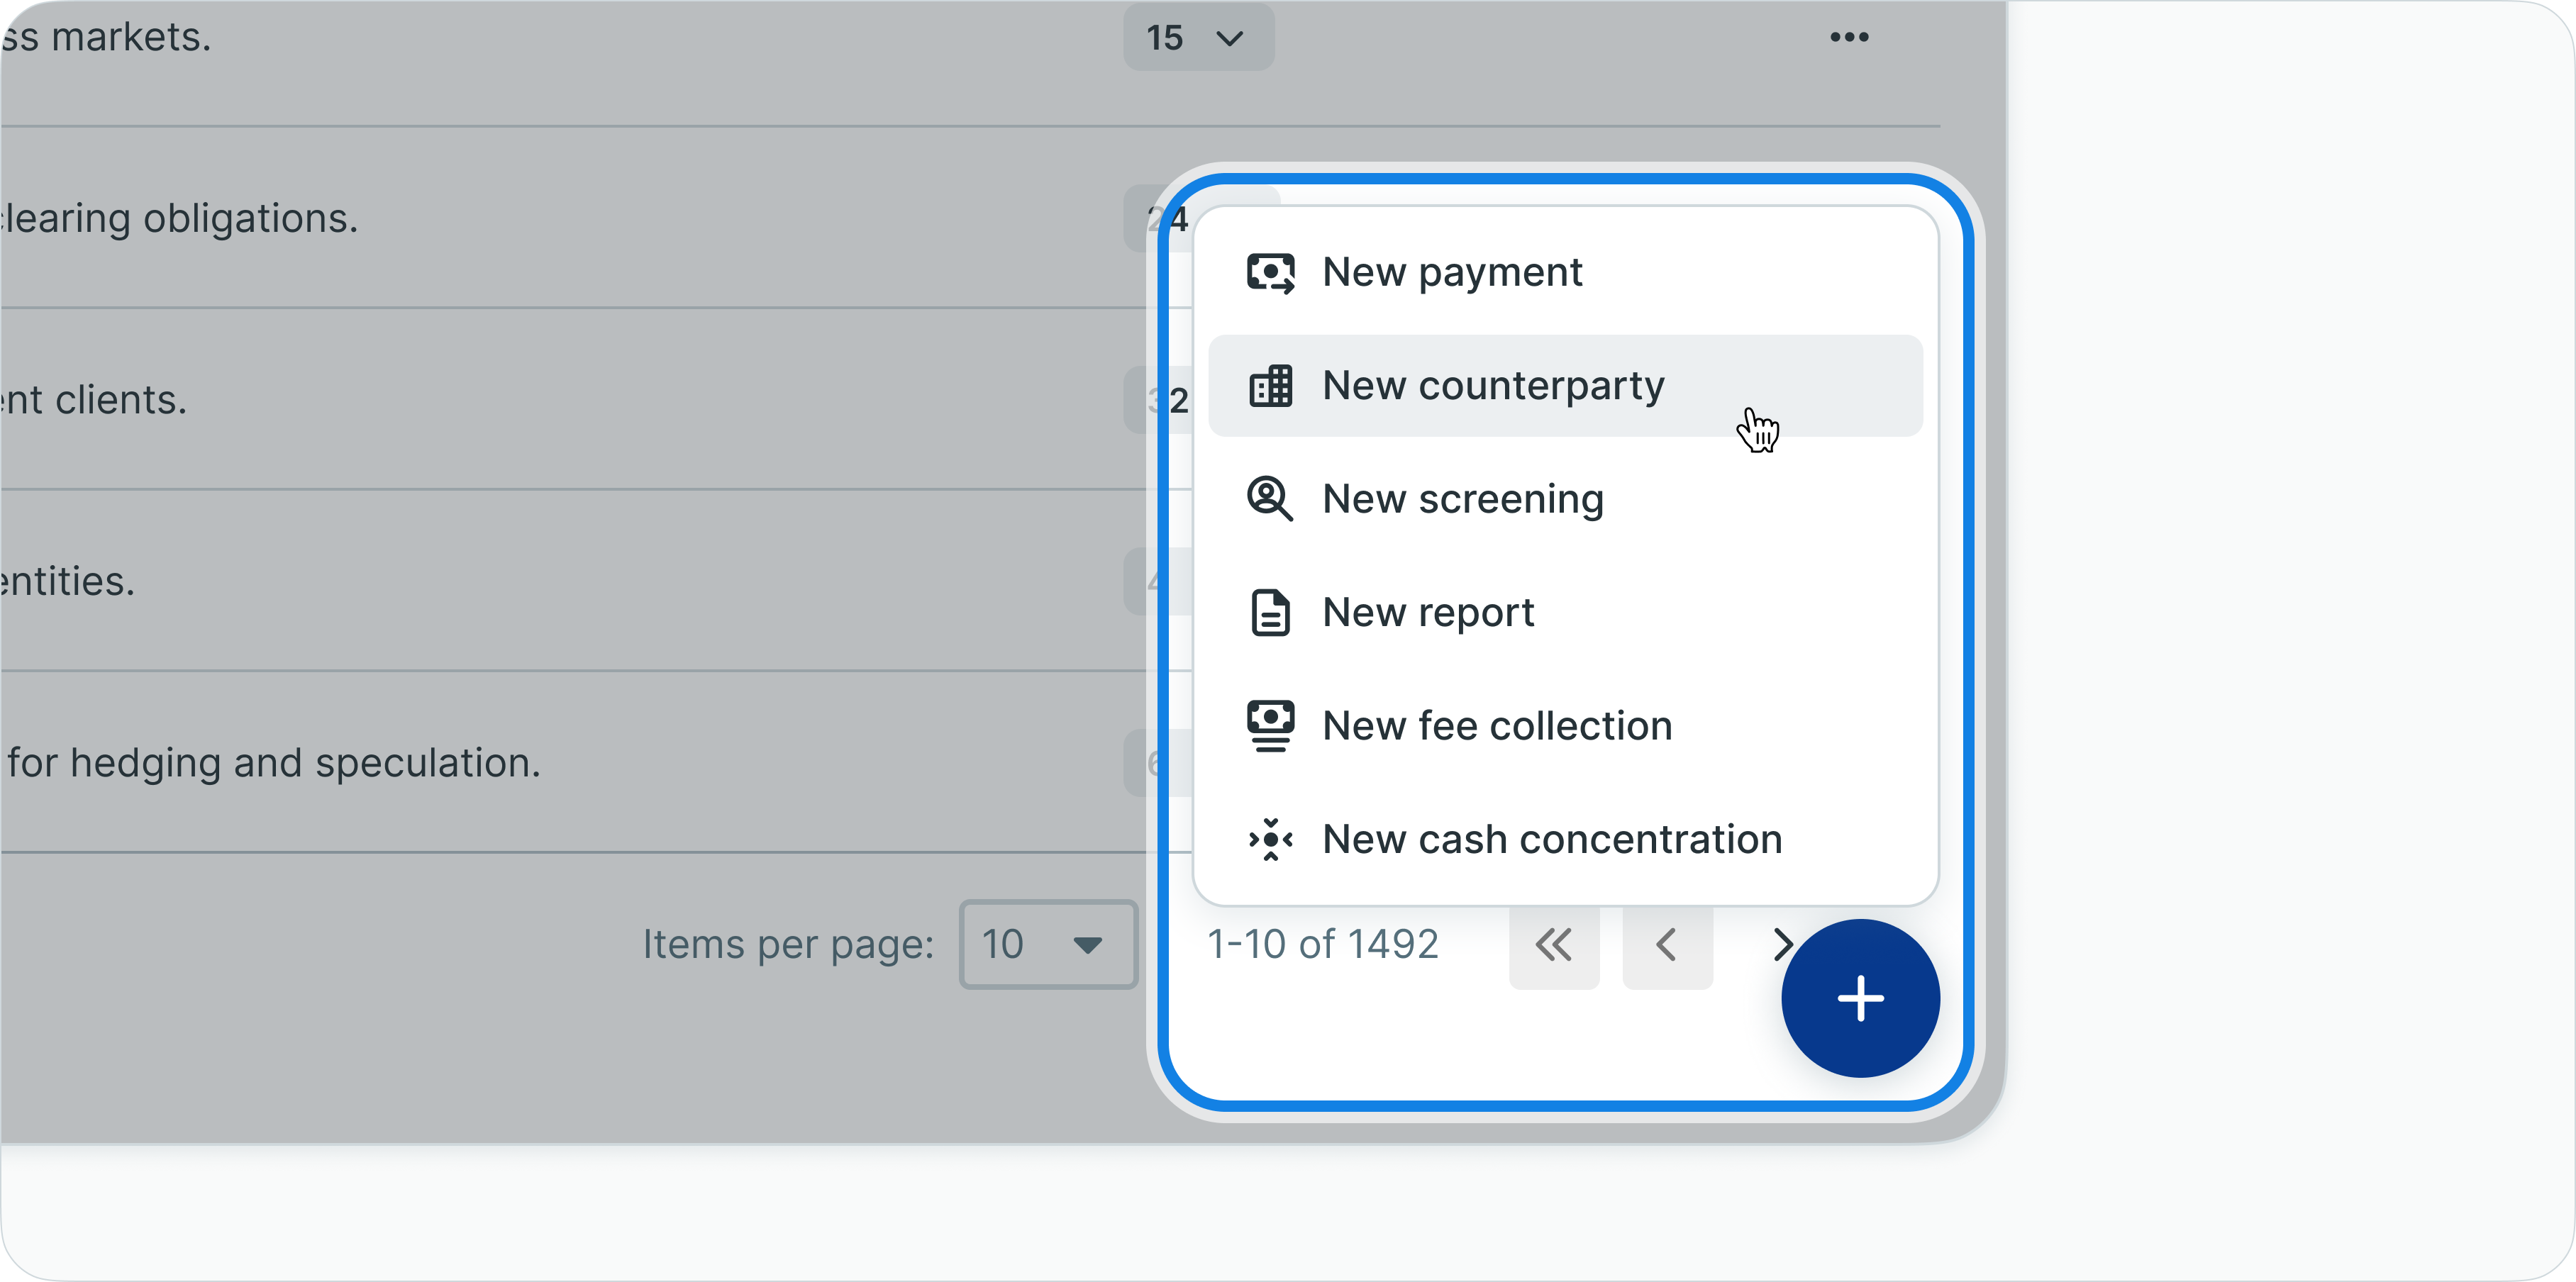
Counterparty creation menu
The system presents creation options for different counterparty types and import methods.

Counterparty type selection
Creating individual counterparties
To create an individual person as a counterparty:
- Click (+) and select New counterparty
- Choose Individual from the options
- The "New individual counterparty" screen opens with tabbed data entry
Complete required information across tabs:
Account details tab:
- Enter beneficiary IBAN (International Bank Account Number)
- Enter BIC/SWIFT code (Bank Identifier Code)
- Provide account holder name
- Optionally add account alias for easy identification
Personal information tab:
- Enter first name and last name
- Provide date of birth (if required)
- Enter address information (street, city, postal code, country)
- Add contact information (email, phone)
Additional information tab:
- Assign risk level (Low, Medium, High) if risk assessment is enabled
- Add internal reference or notes
- Attach supporting documentation if required
Finalizing creation:
- Review all entered information for accuracy
- Click Save to create the counterparty
- The counterparty is created with status "Pending" and requires approval
Following the four-eyes principle, the counterparty now awaits authorization from a different user before becoming available for payment use.
Creating organization counterparties
To create a legal entity as a counterparty:
- Click (+) and select New counterparty
- Choose Organization from the options
- The "New organization counterparty" screen opens
Complete required information:
Account details tab:
- Enter organization IBAN
- Enter BIC/SWIFT code
- Provide official organization name as account holder
Organization information tab:
- Enter legal entity name
- Provide registration number or company identifier
- Enter registered address
- Add contact person information
Additional information tab:
- Assign risk level if required
- Add internal reference codes
- Attach relevant documentation (contracts, agreements)
Click Save to create the organization counterparty, which then requires approval before use.
Bulk counterparty import
To create multiple counterparties simultaneously through file upload:
- Navigate to Counterparties from the main menu
- Click the Upload counterparties button in the top right corner
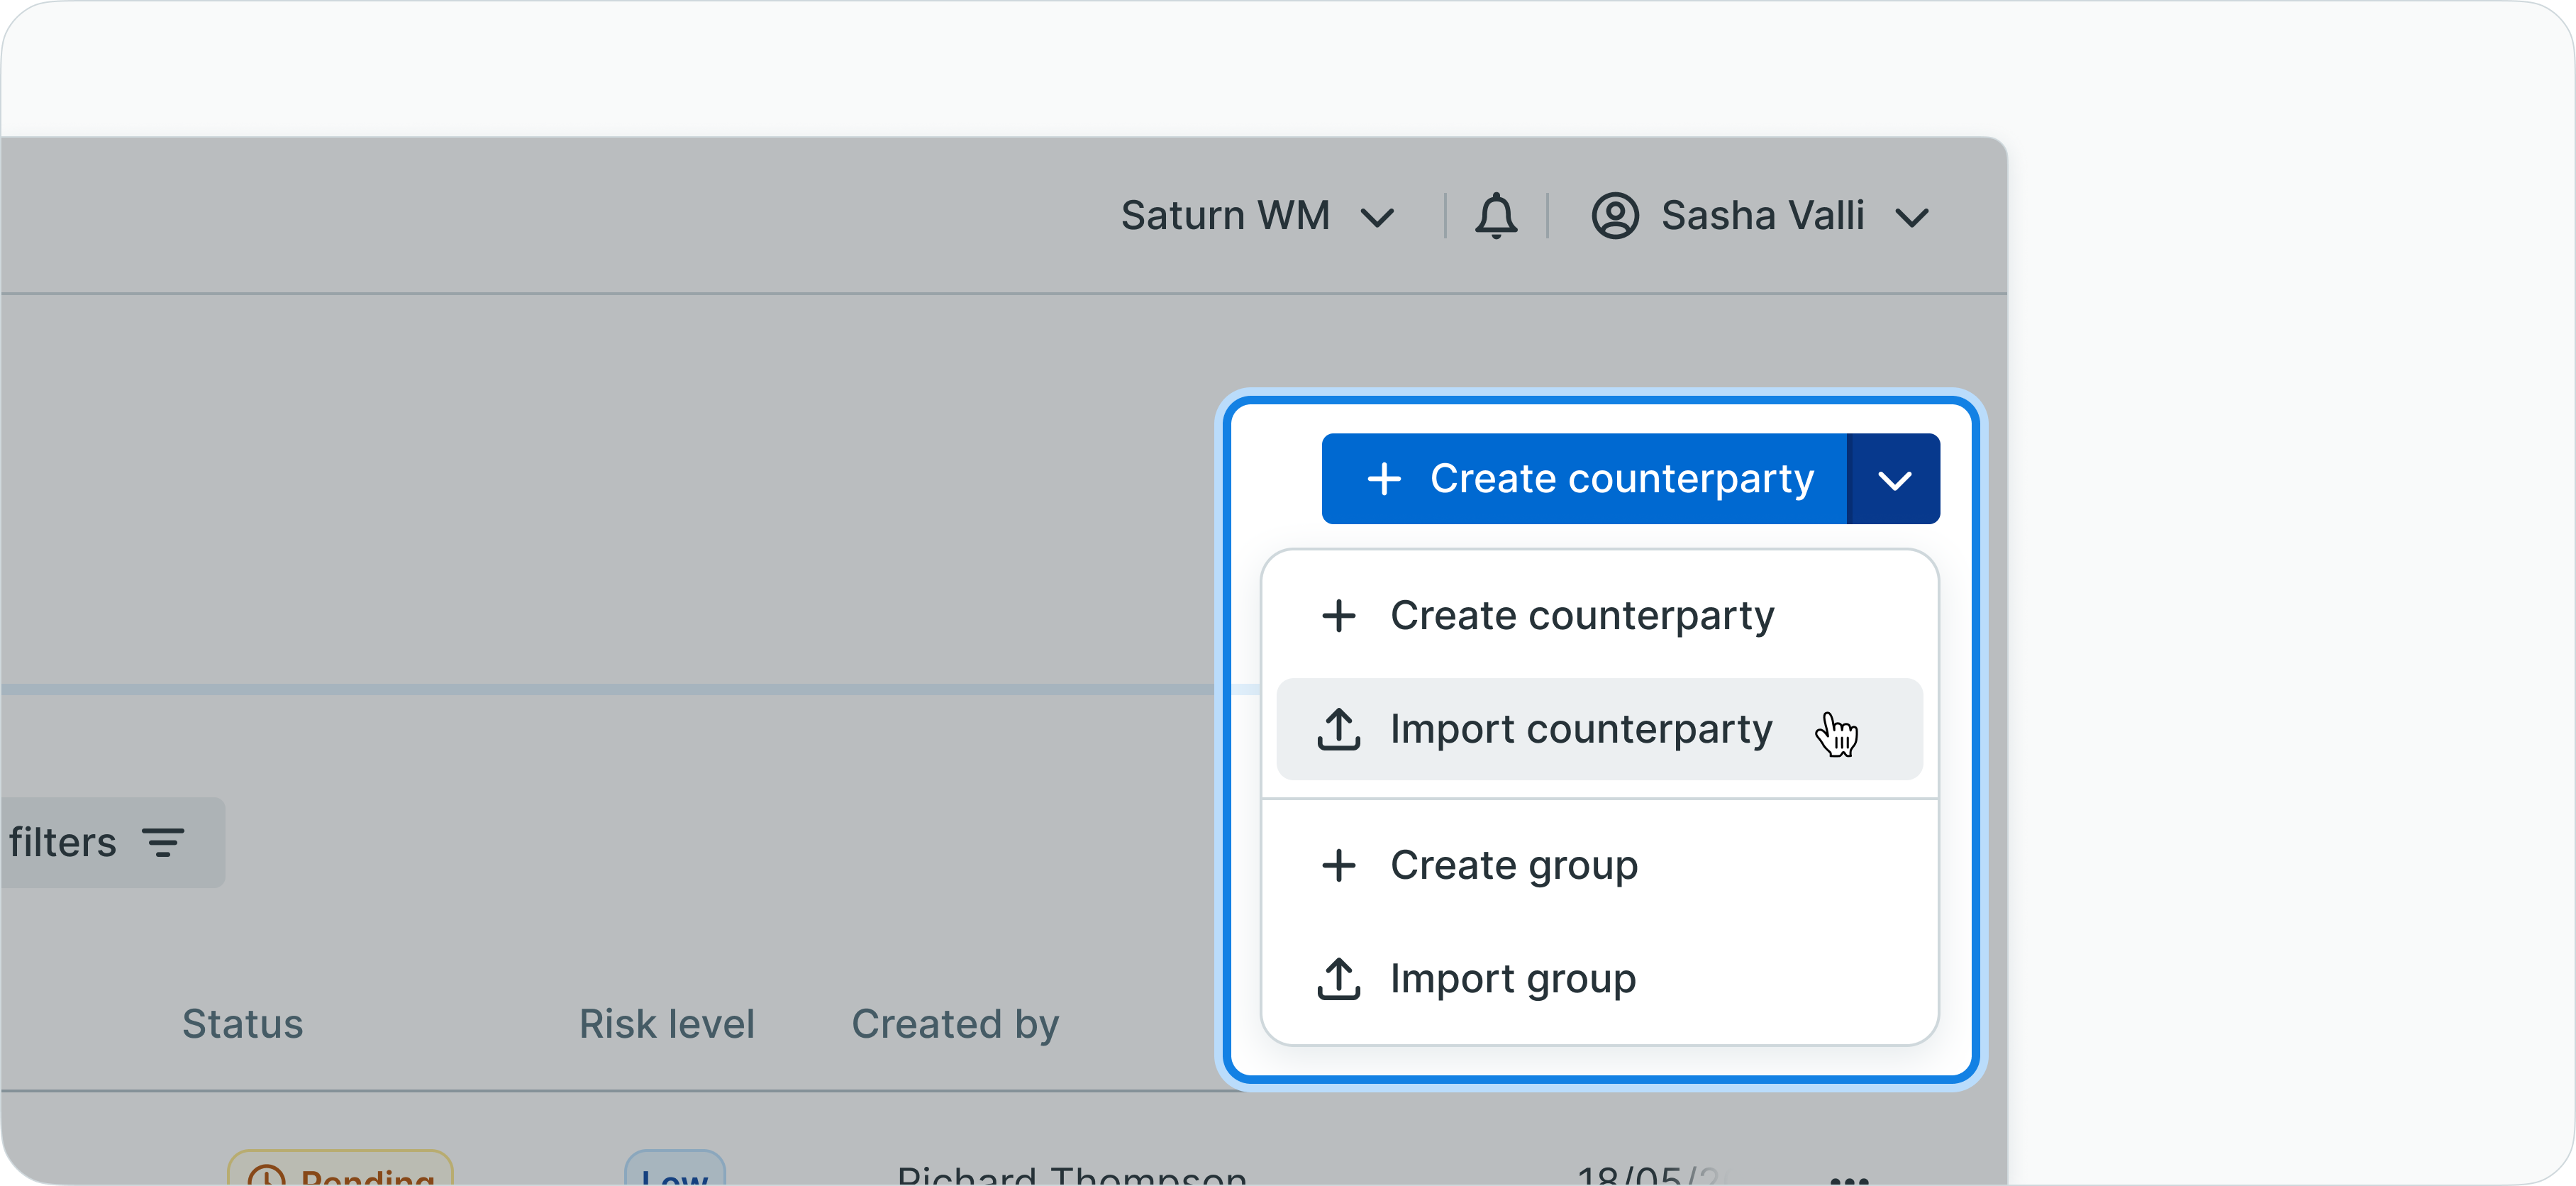
Counterparties upload button
- Prepare your counterparty file in supported format:
- CSV format (.csv)
- Excel format (.xlsx or .xls)
File requirements:
- Include required fields: IBAN, BIC, account holder name
- Follow LYNKS template structure for column headers
- Ensure data validation (valid IBANs, BIC codes, proper formatting)
- Remove duplicate entries
Uploading the file:
- Drop your prepared file into the marked upload area
- Or click Browse to select the file from your device
- The system validates file contents and checks for:
- Format compliance
- Data validation errors
- Duplicate counterparties (matching IBAN and BIC combinations)
Reviewing validation results:
- Review the validation summary showing:
- Number of counterparties successfully validated
- Existing counterparties that will be updated
- Validation errors requiring correction
- Correct any errors in your file if needed
- Re-upload the corrected file
Confirming upload:
- Review the summary of counterparties to be created/updated
- Click Confirm to proceed with the import
- All imported counterparties are created with "Pending" status
- Bulk-imported counterparties require individual approval before use
Update vs. create behaviorWhen uploading counterparties, LYNKS checks if the IBAN and BIC combination already exists. Matching counterparties are updated with new information from the file, while new combinations create new counterparty records.
Editing counterparties
Counterparty information can be modified through the user interface or updated through bulk file upload, enabling maintenance of accurate beneficiary data.
Editing counterparties through UI
To modify counterparty information using the interface:
Step 1: Locate the counterparty
- Navigate to Counterparties from the main menu
- Use the search field to find the counterparty:
- Search by IBAN
- Search by counterparty name
- Search by alias
- Click the counterparty row to open details
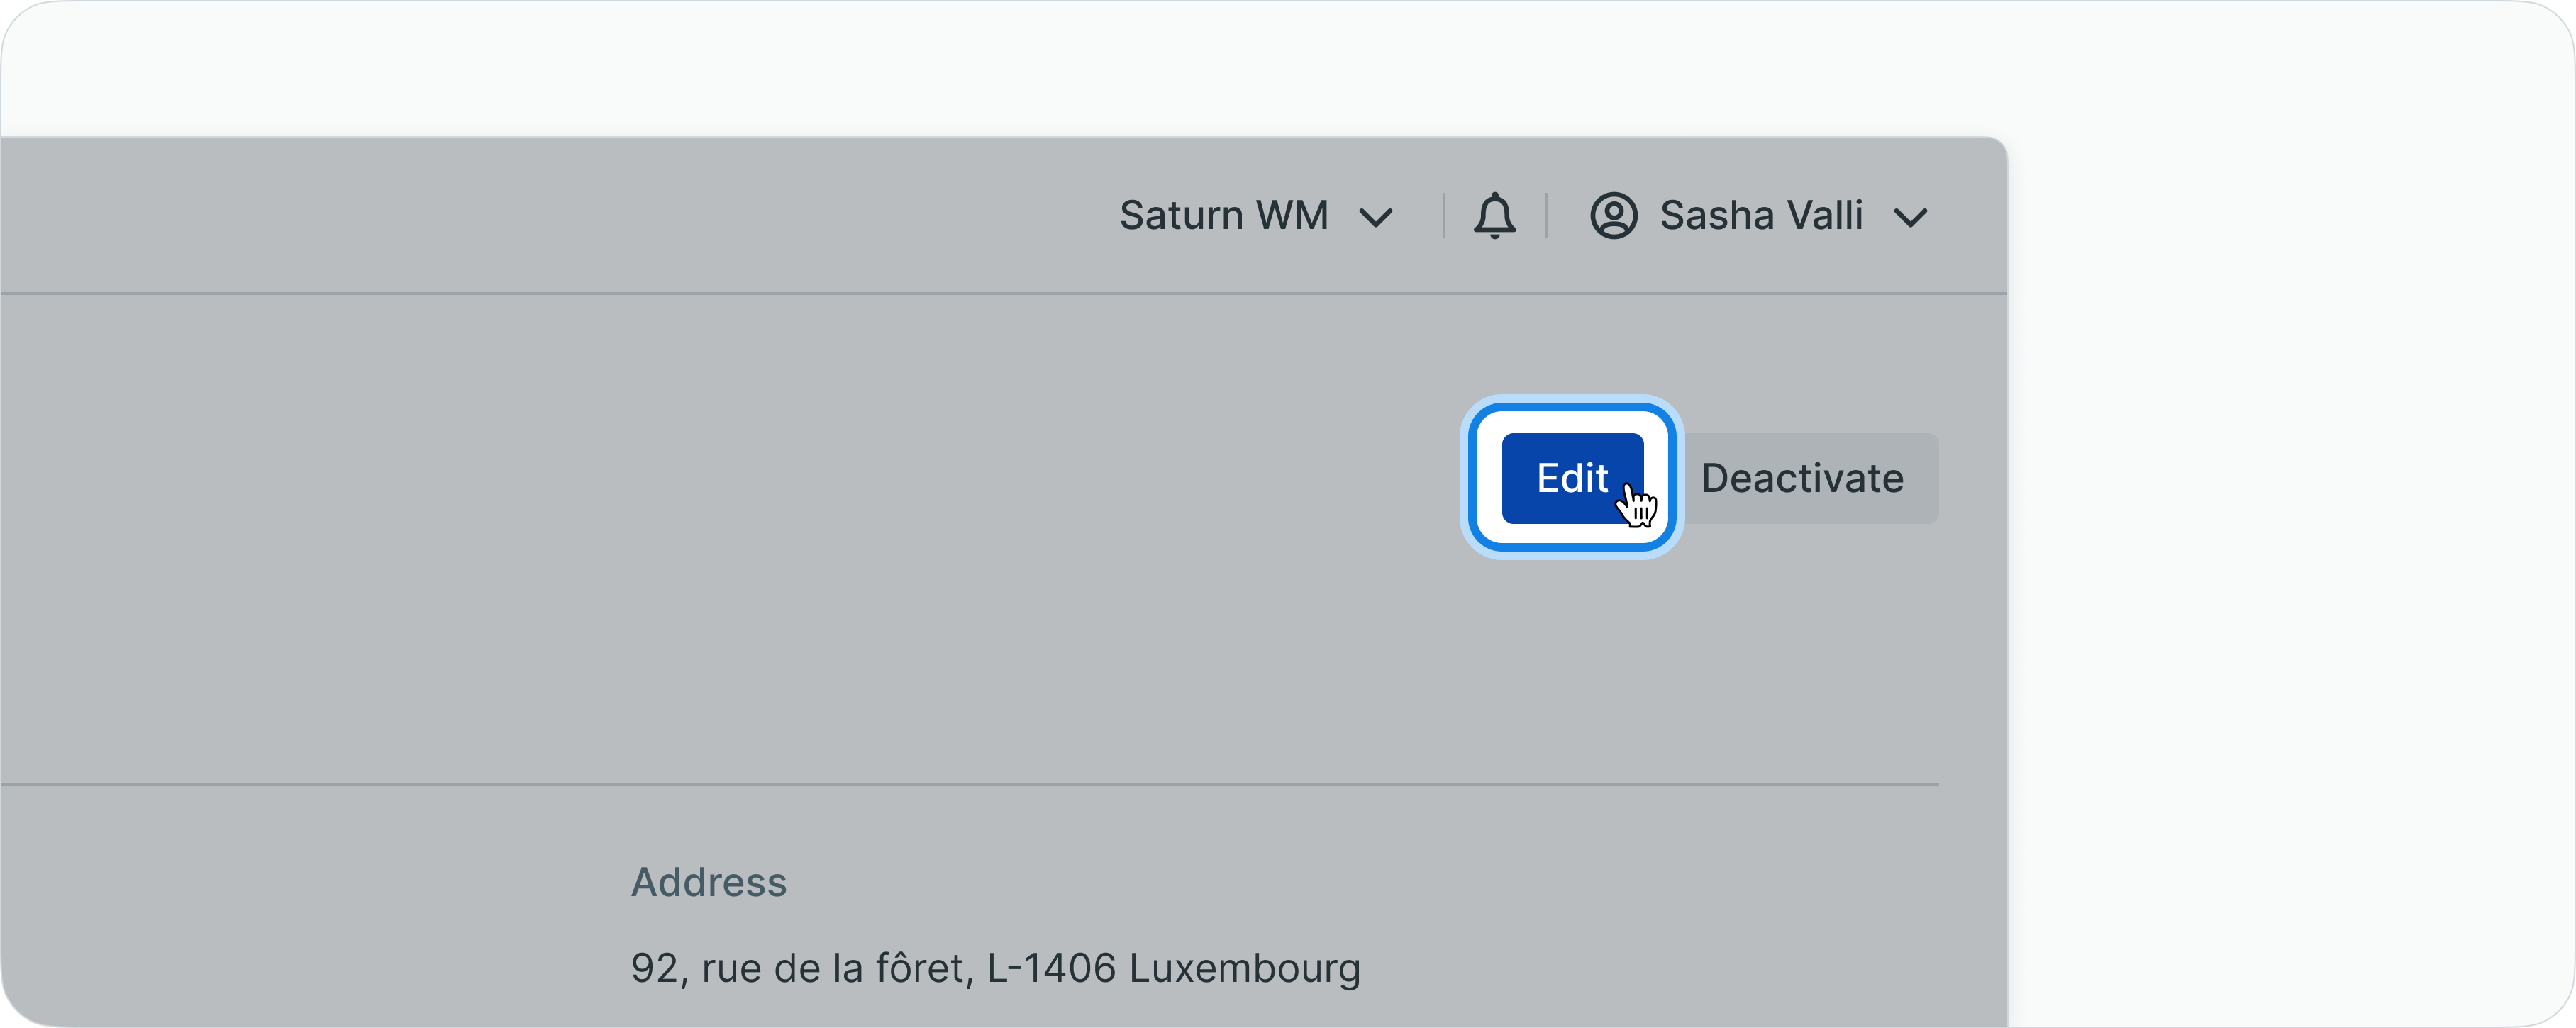
Counterparty details with edit button
Step 2: Enter edit mode
- On the details screen, locate the Edit button in the top right corner
- Click Edit to open the editing modal
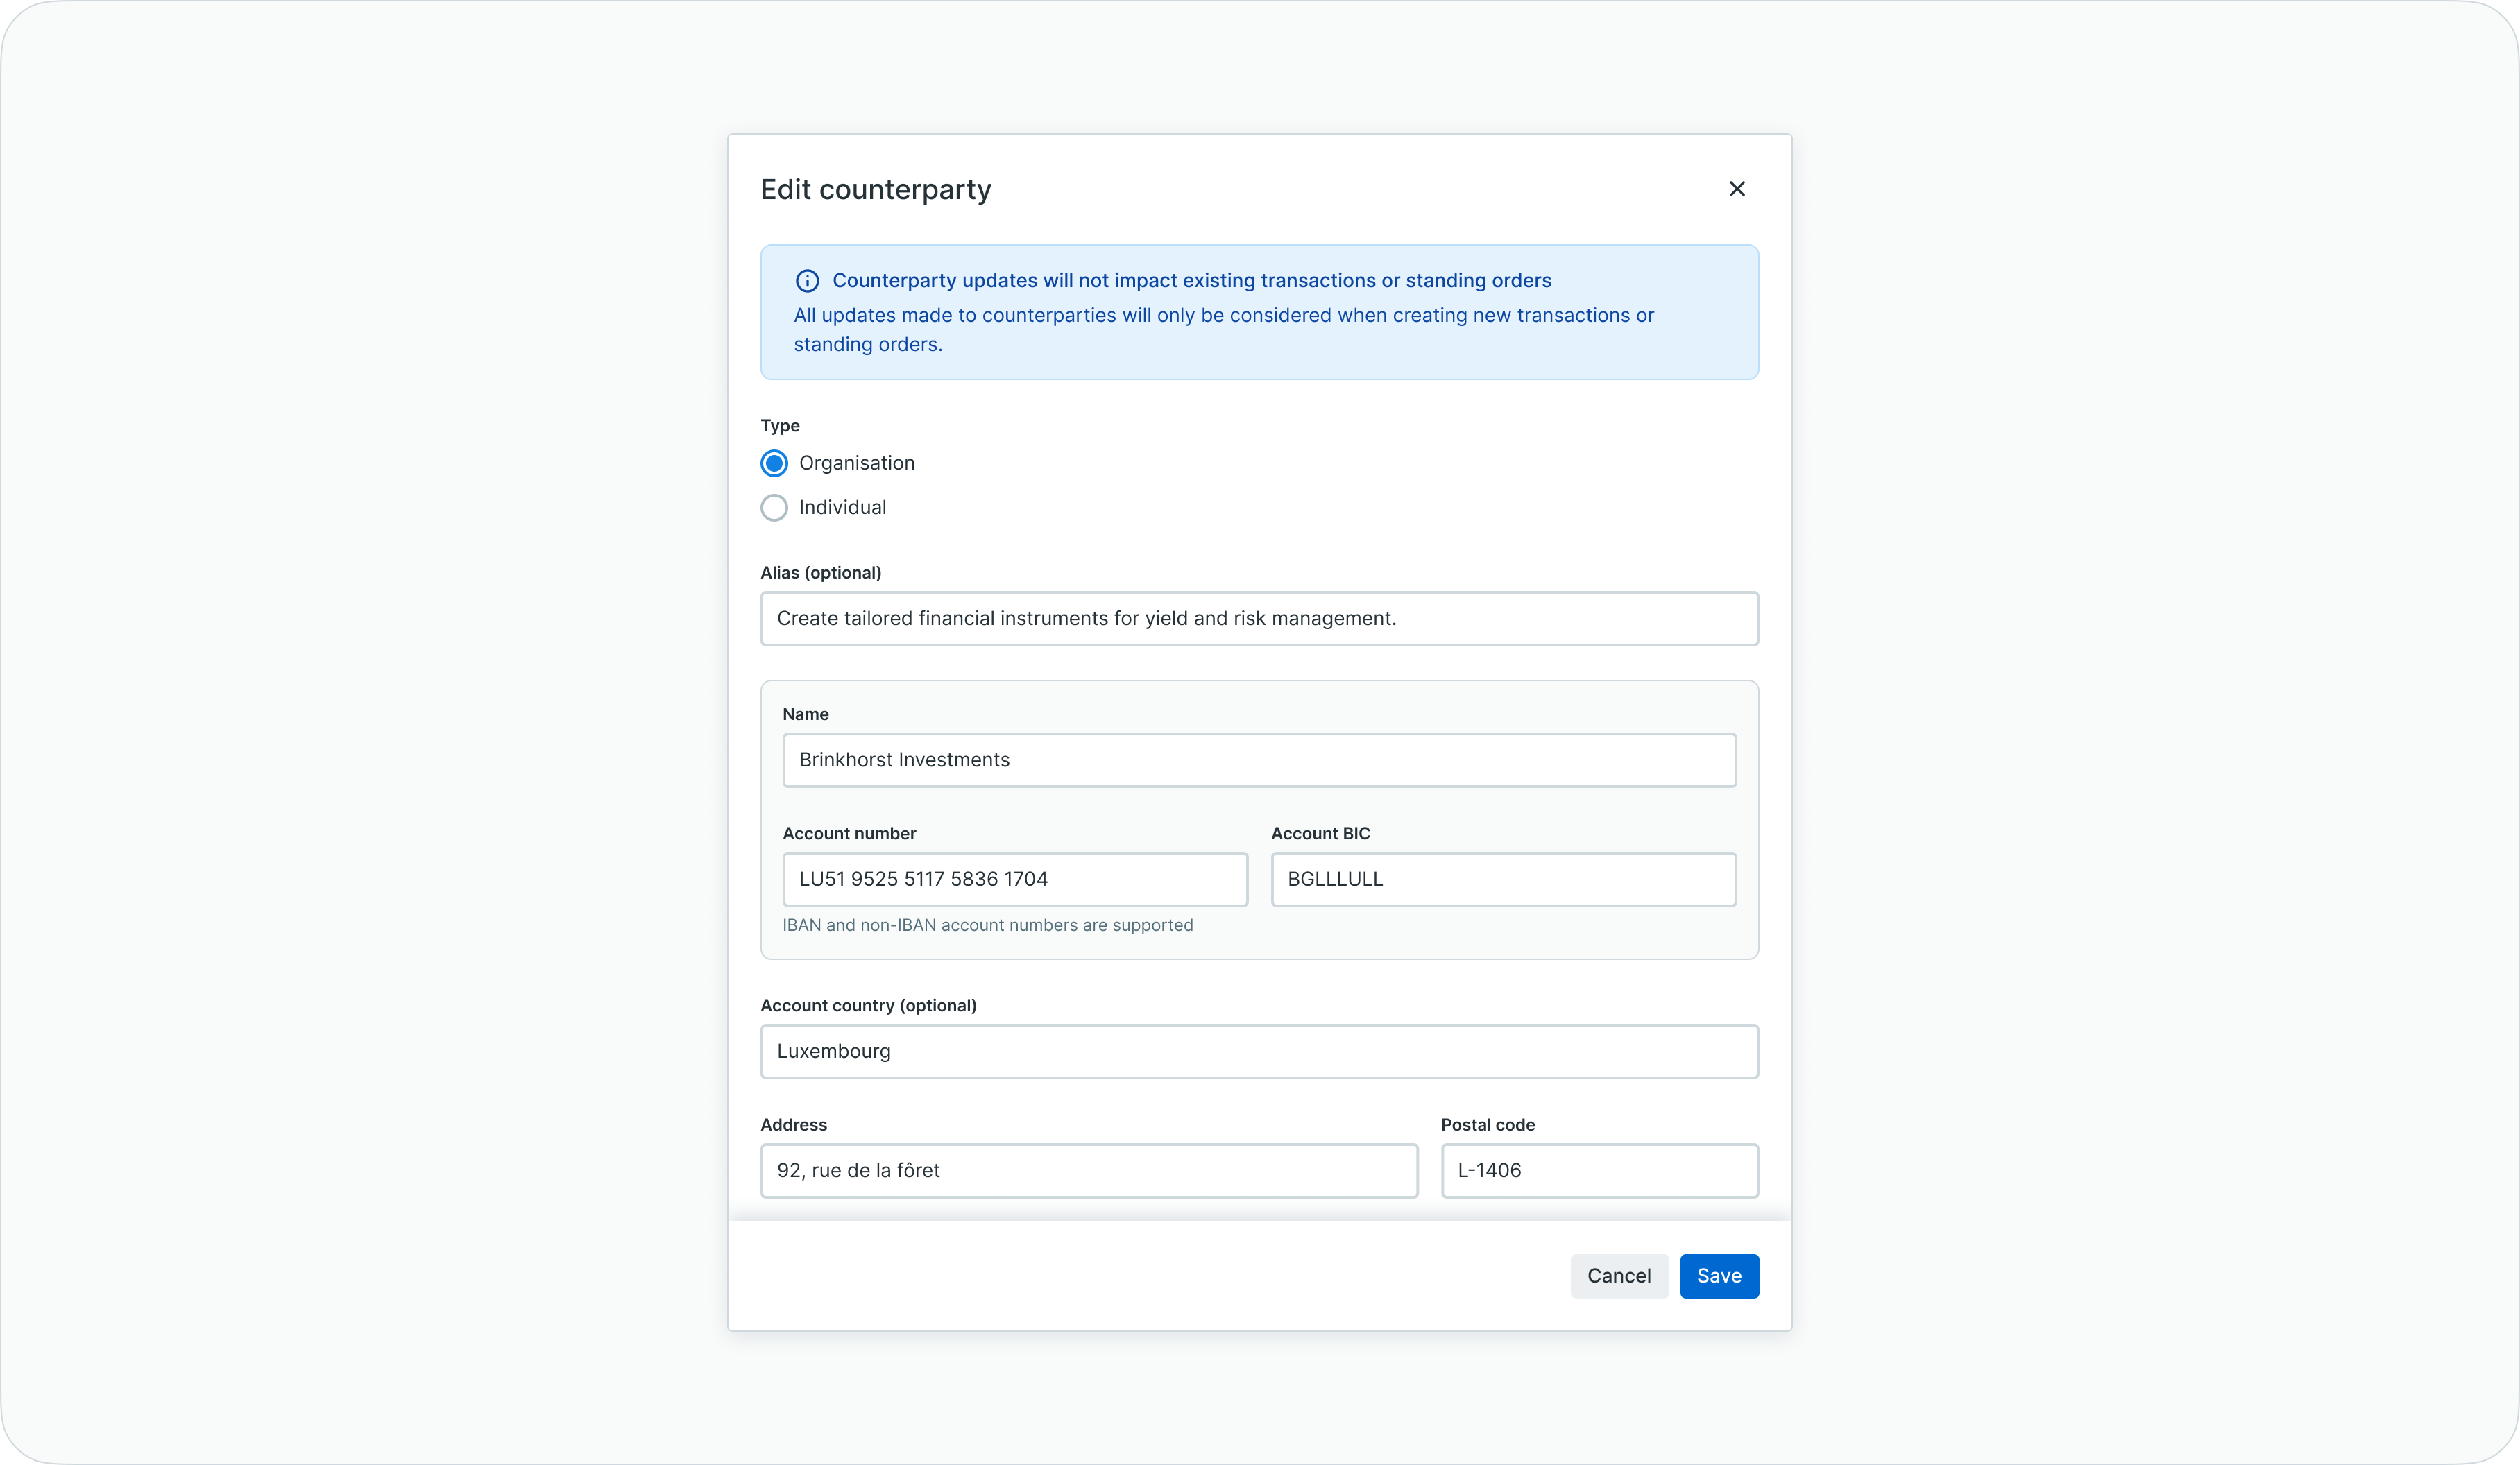
Counterparty editing modal
Step 3: Modify information
- Update fields as needed across all tabs:
- Account details (IBAN, BIC, account holder name, alias)
- Personal/Organization information
- Risk level
- Additional notes and documentation
- Review all changes for accuracy
Step 4: Save changes
- Click Save to store modifications
- Modified counterparties return to "Pending" status
- Changes require approval following four-eyes principle before taking effect
Editing counterparties through file upload
To update multiple counterparties simultaneously:
Prepare update file:
- Export existing counterparty data or prepare a file containing:
- Existing IBAN and BIC combinations (to identify counterparties to update)
- Modified information in updated fields
- Same format as bulk import (CSV, XLSX, or XLS)
Upload and validate:
- Navigate to Counterparties page
- Click Upload counterparties button
- Drop or browse to select your prepared file
- The system validates and identifies:
- Existing counterparties to update (matching IBAN and BIC)
- New counterparties to create (new IBAN and BIC combinations)
- Any validation errors
Confirm updates:
- Review the validation summary
- Verify which counterparties will be updated
- Click Confirm to apply changes
- Updated counterparties move to "Pending" status and require approval
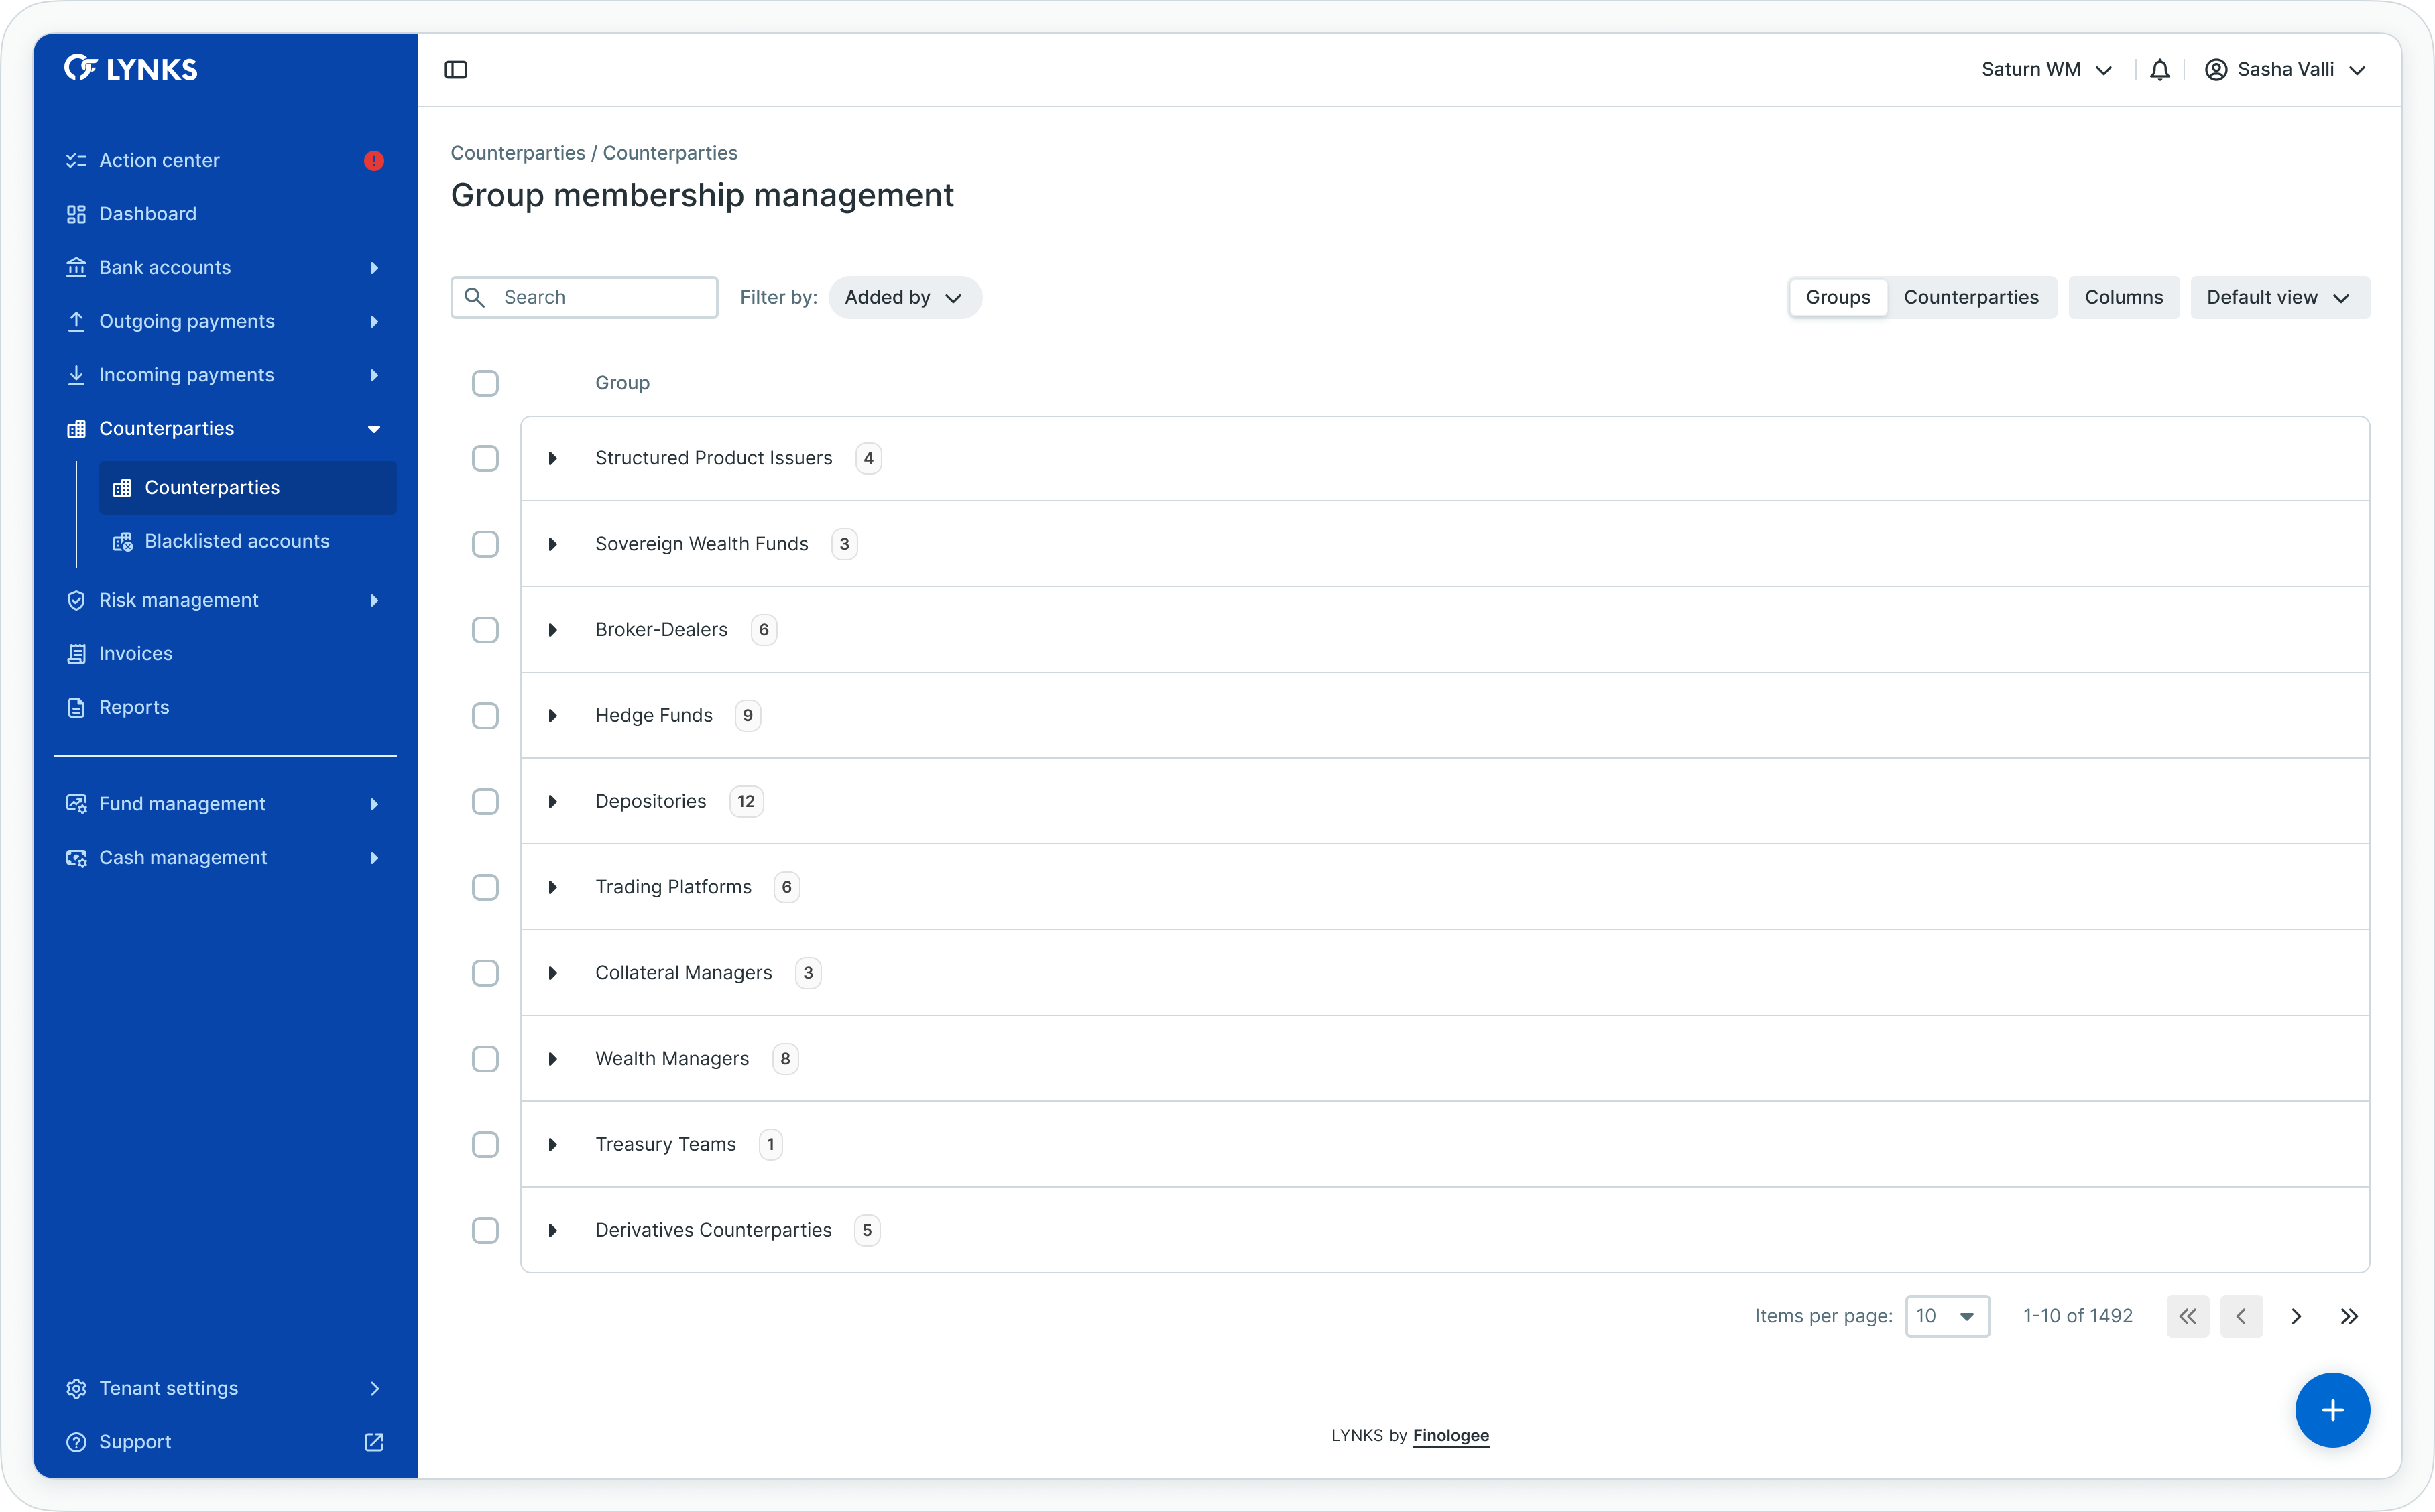
Managing counterparty groups
Counterparty groups enable logical organization of beneficiaries by business unit, purpose, geographic region, or any custom criteria relevant to operational needs.
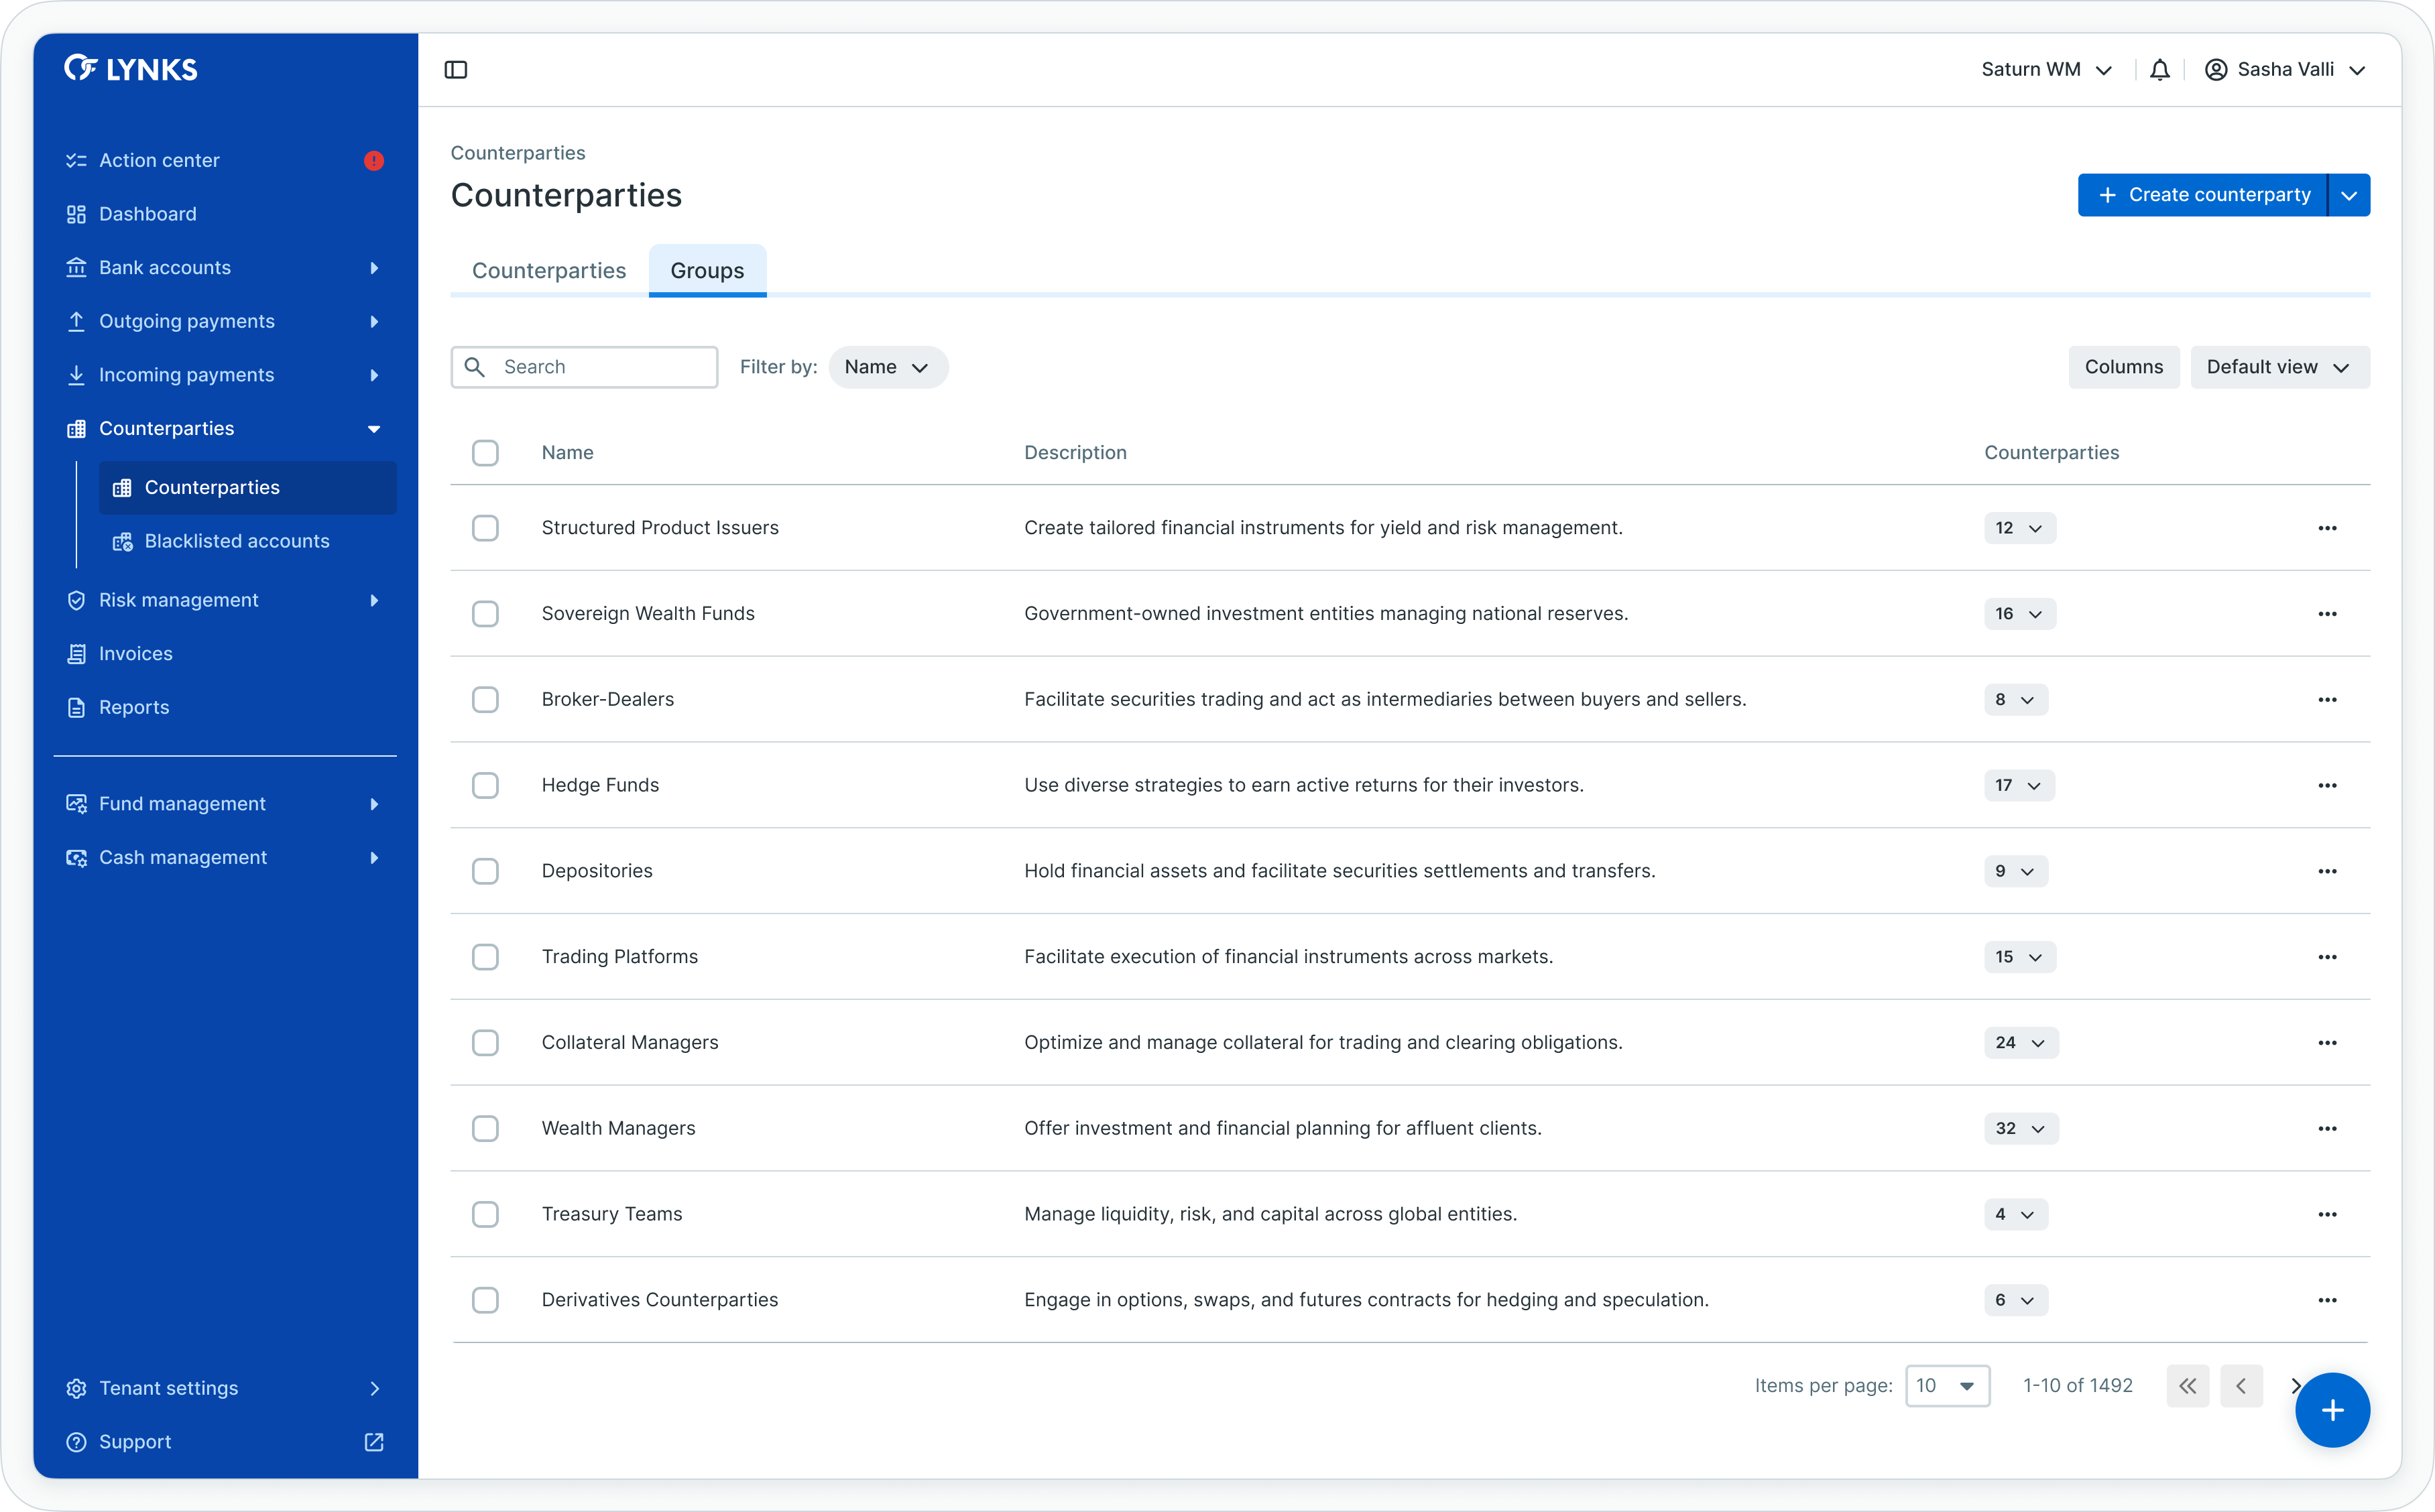
Counterparty groups list view
Creating counterparty groups
To create a counterparty group:
- Navigate to Counterparties page
- Click the groups management button or navigate to groups view
- Click Create group or (+)
- Enter a descriptive group name (e.g., "European Suppliers", "Payroll Recipients", "Monthly Vendors")
- Optionally add a description
- Click Save to create the group
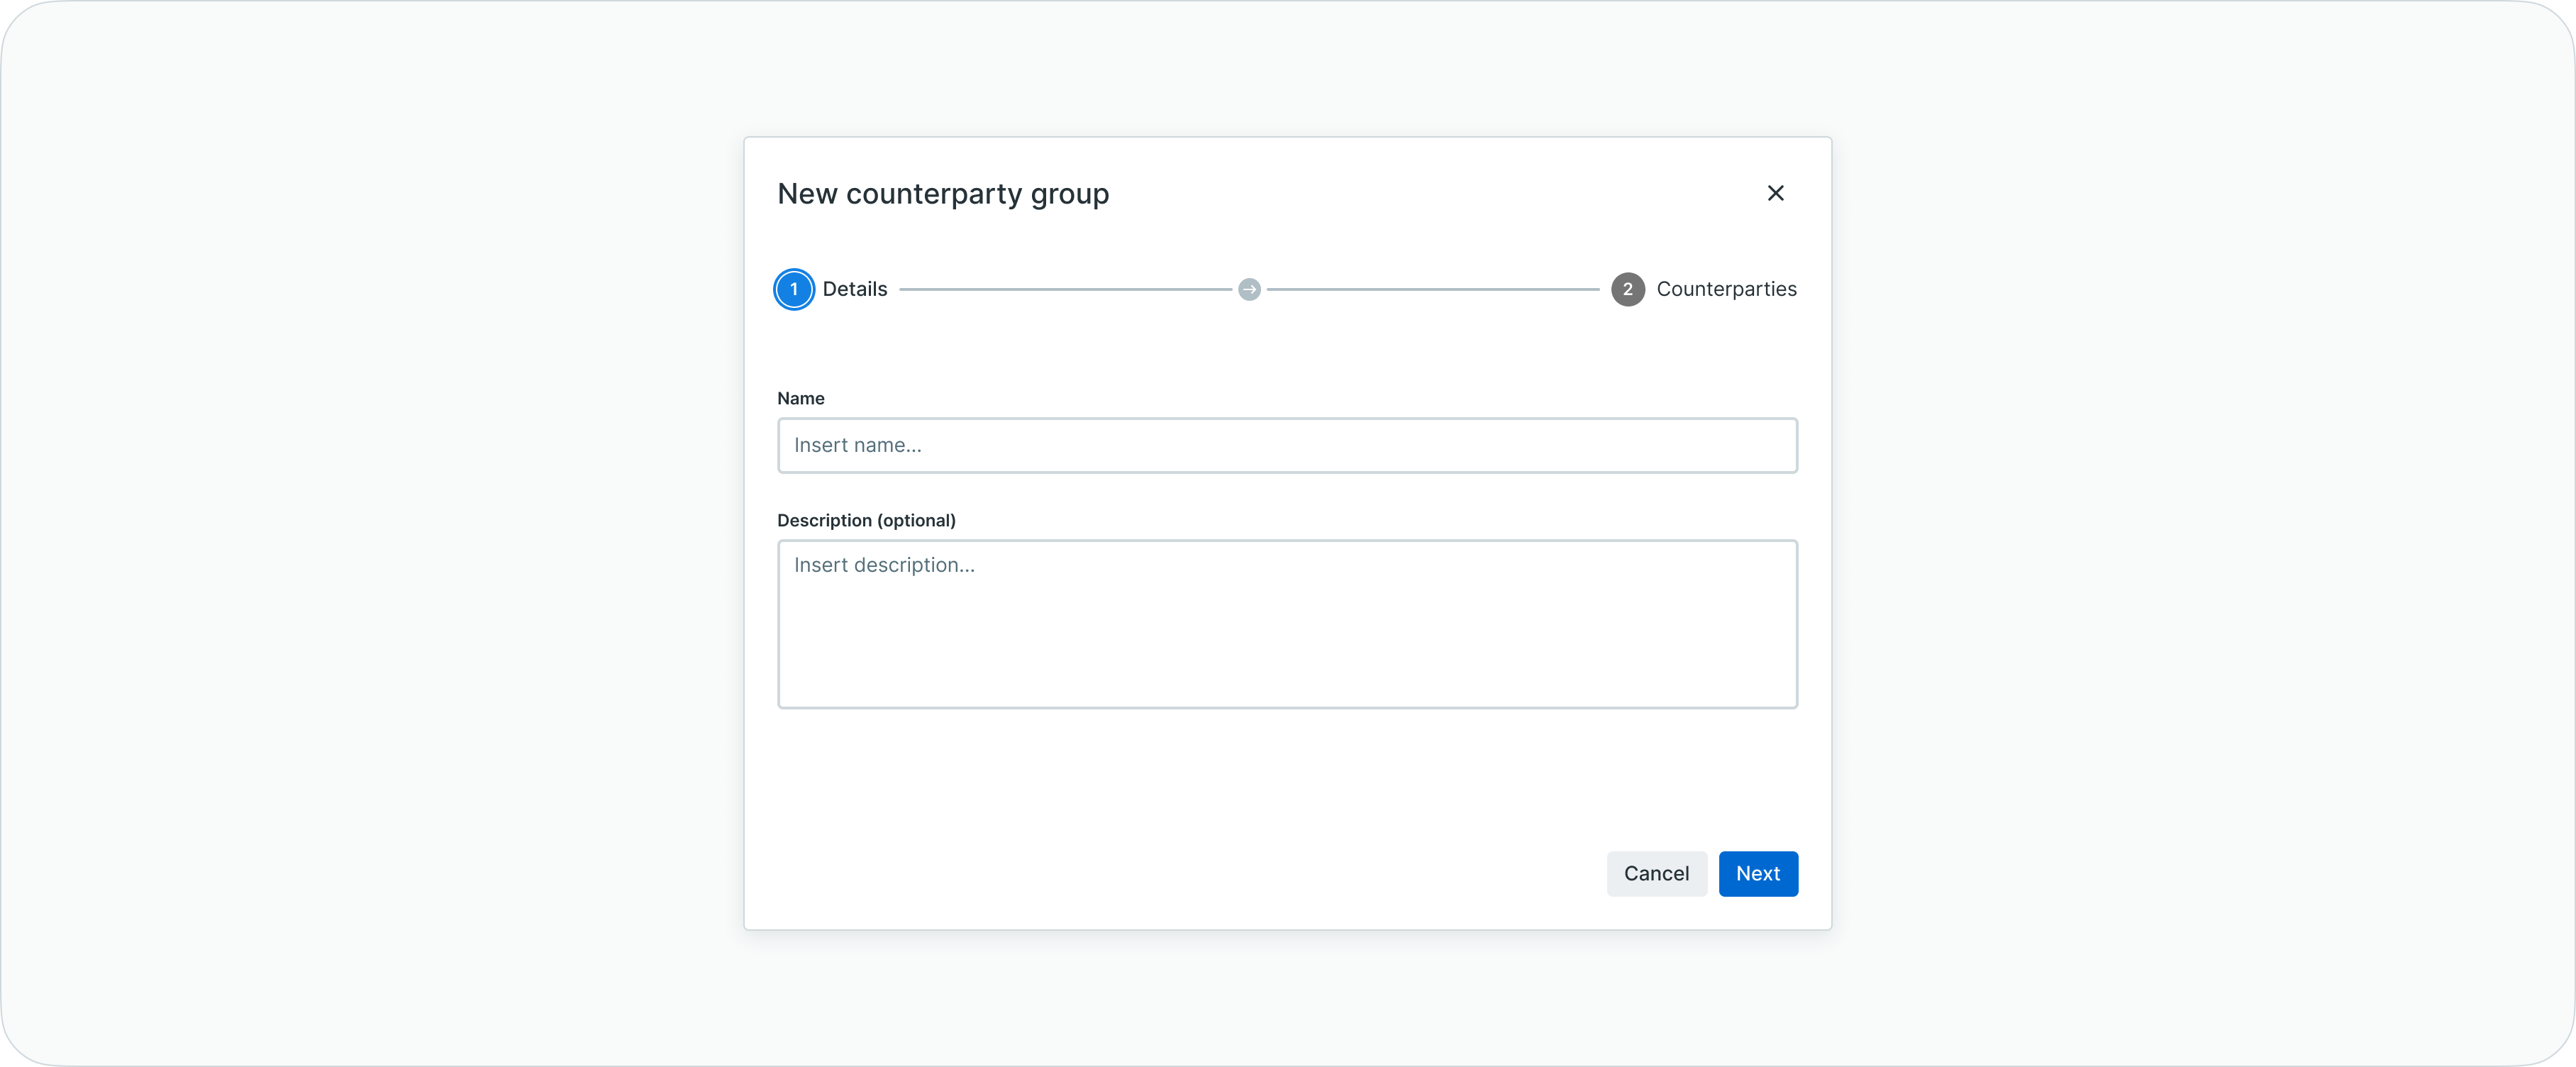
Create counterparty group - Insert details
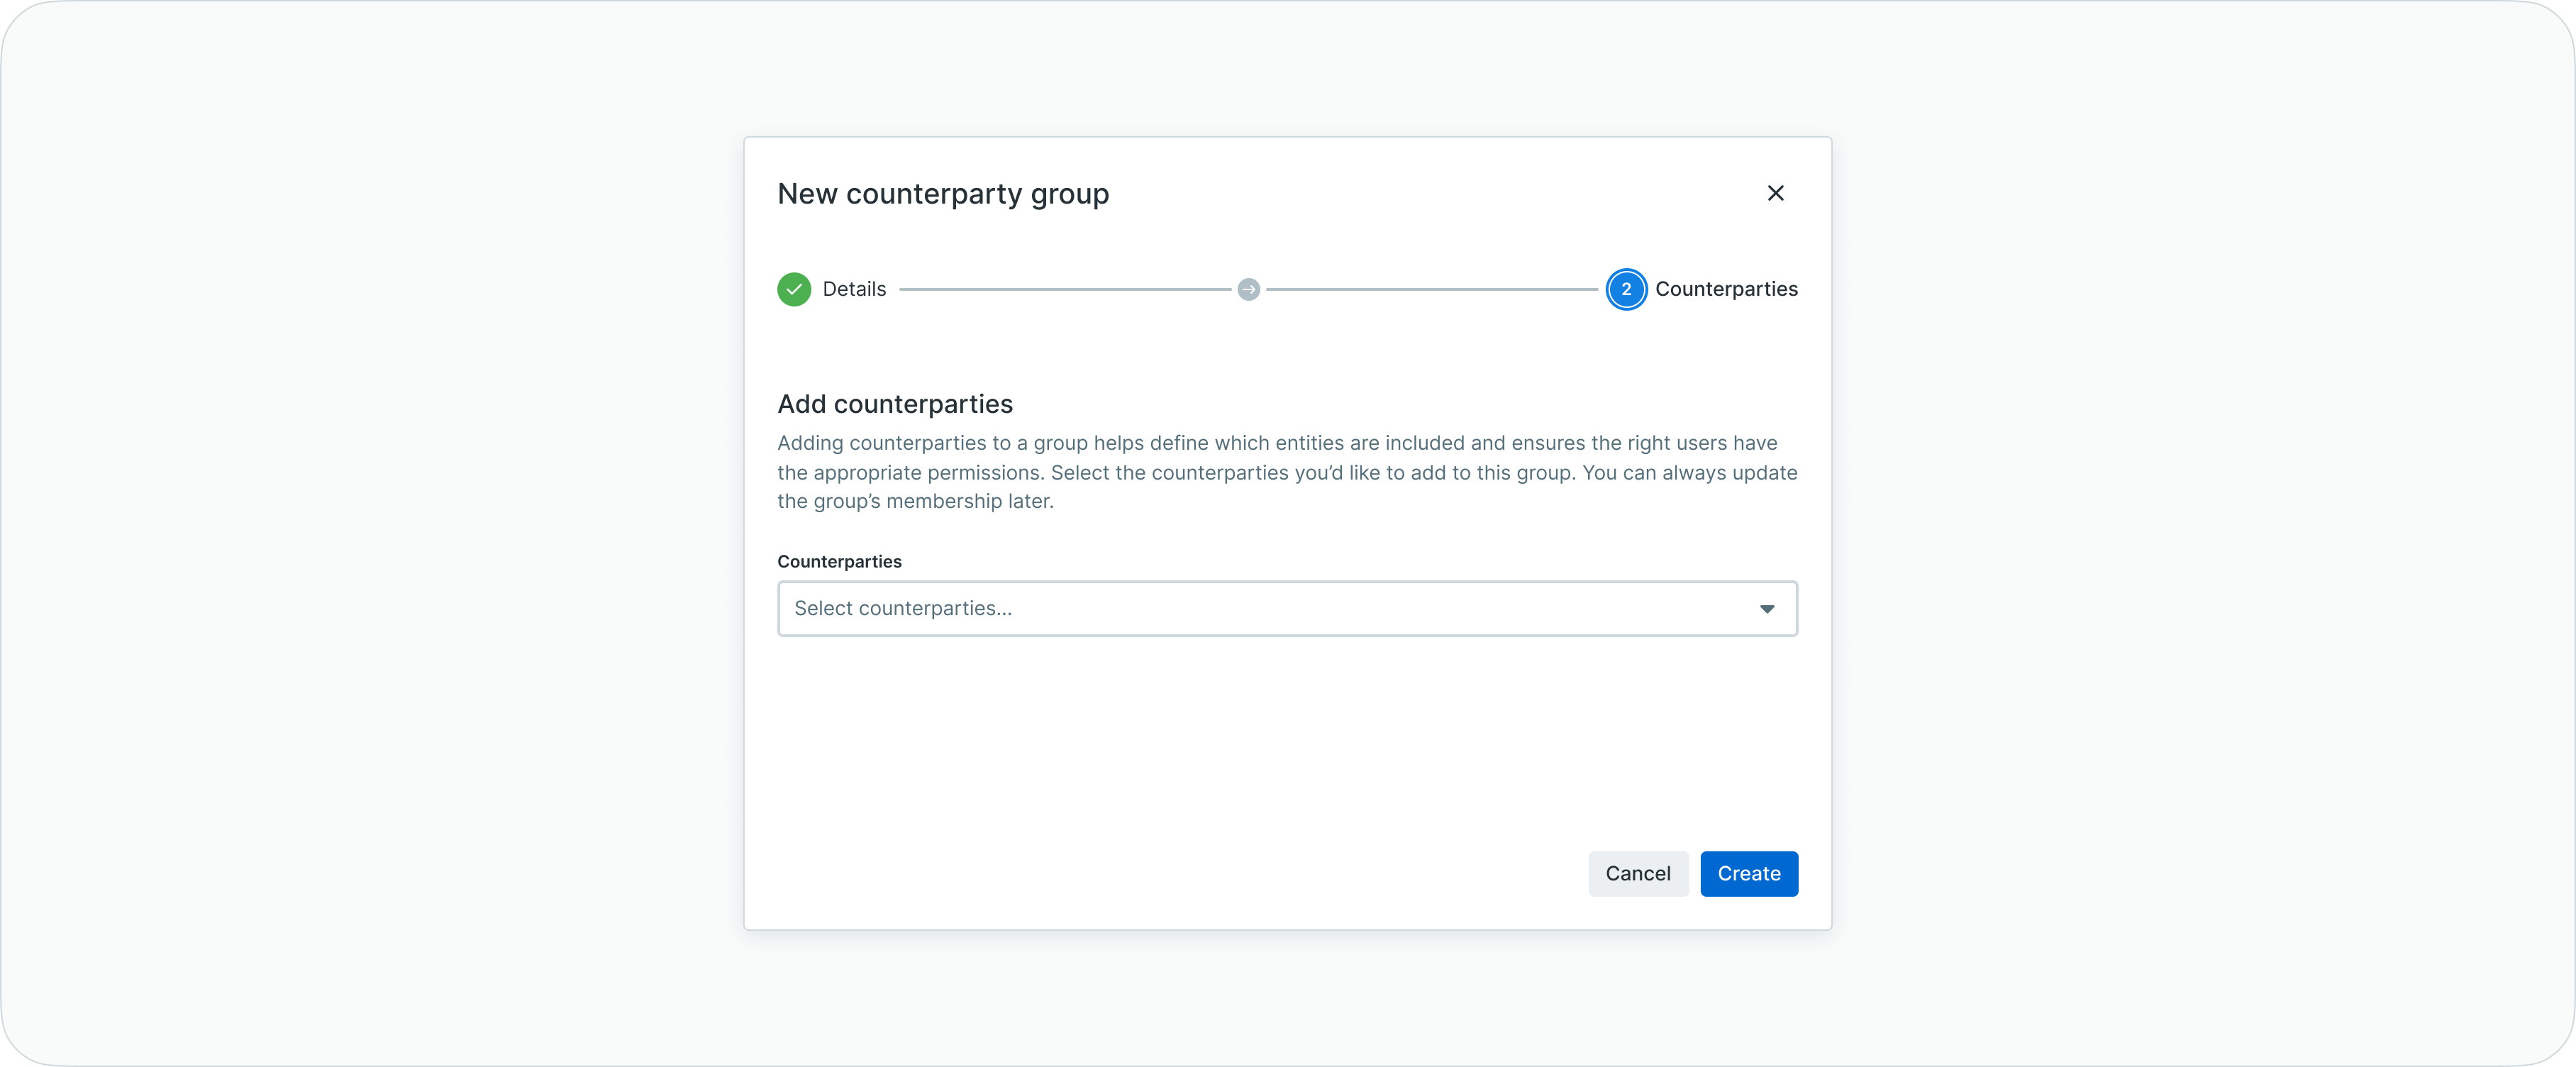
Create counterparty group - Add counterparties
Adding counterparties to groups
To assign counterparties to a group:
From counterparties list:
- Select counterparties using checkboxes (multi-select supported)
- Click bulk actions menu
- Select Add to group
- Choose target group from dropdown
- Click Confirm
From individual counterparty:
- Open counterparty details
- Click Actions or overflow menu
- Select Add to group
- Choose target group
- Click Confirm
Removing counterparties from groups
To remove group assignments:
- Navigate to the group view or filter by specific group
- Select counterparties to remove from the group
- Click bulk actions menu
- Select Remove from group
- Confirm removal
Removing from a group does not delete or deactivate the counterparty - it only removes the group association.
Viewing group details
Each counterparty group has a dedicated detail page showing group information and membership.
To access the group detail page:
- Navigate to the counterparty groups view
- Click on a group row to open its details
The group detail page displays:
- Group information - Group name, description, and creation details
- Member list - All counterparties assigned to the group with their account information
- Member status - Shows active, pending, or rejected group memberships
- Group actions - Edit group settings, add/remove members, delete group
- Membership statistics - Total member count and status breakdown
From the group detail page, you can perform all group management actions including adding new members, removing existing members, and modifying group settings.
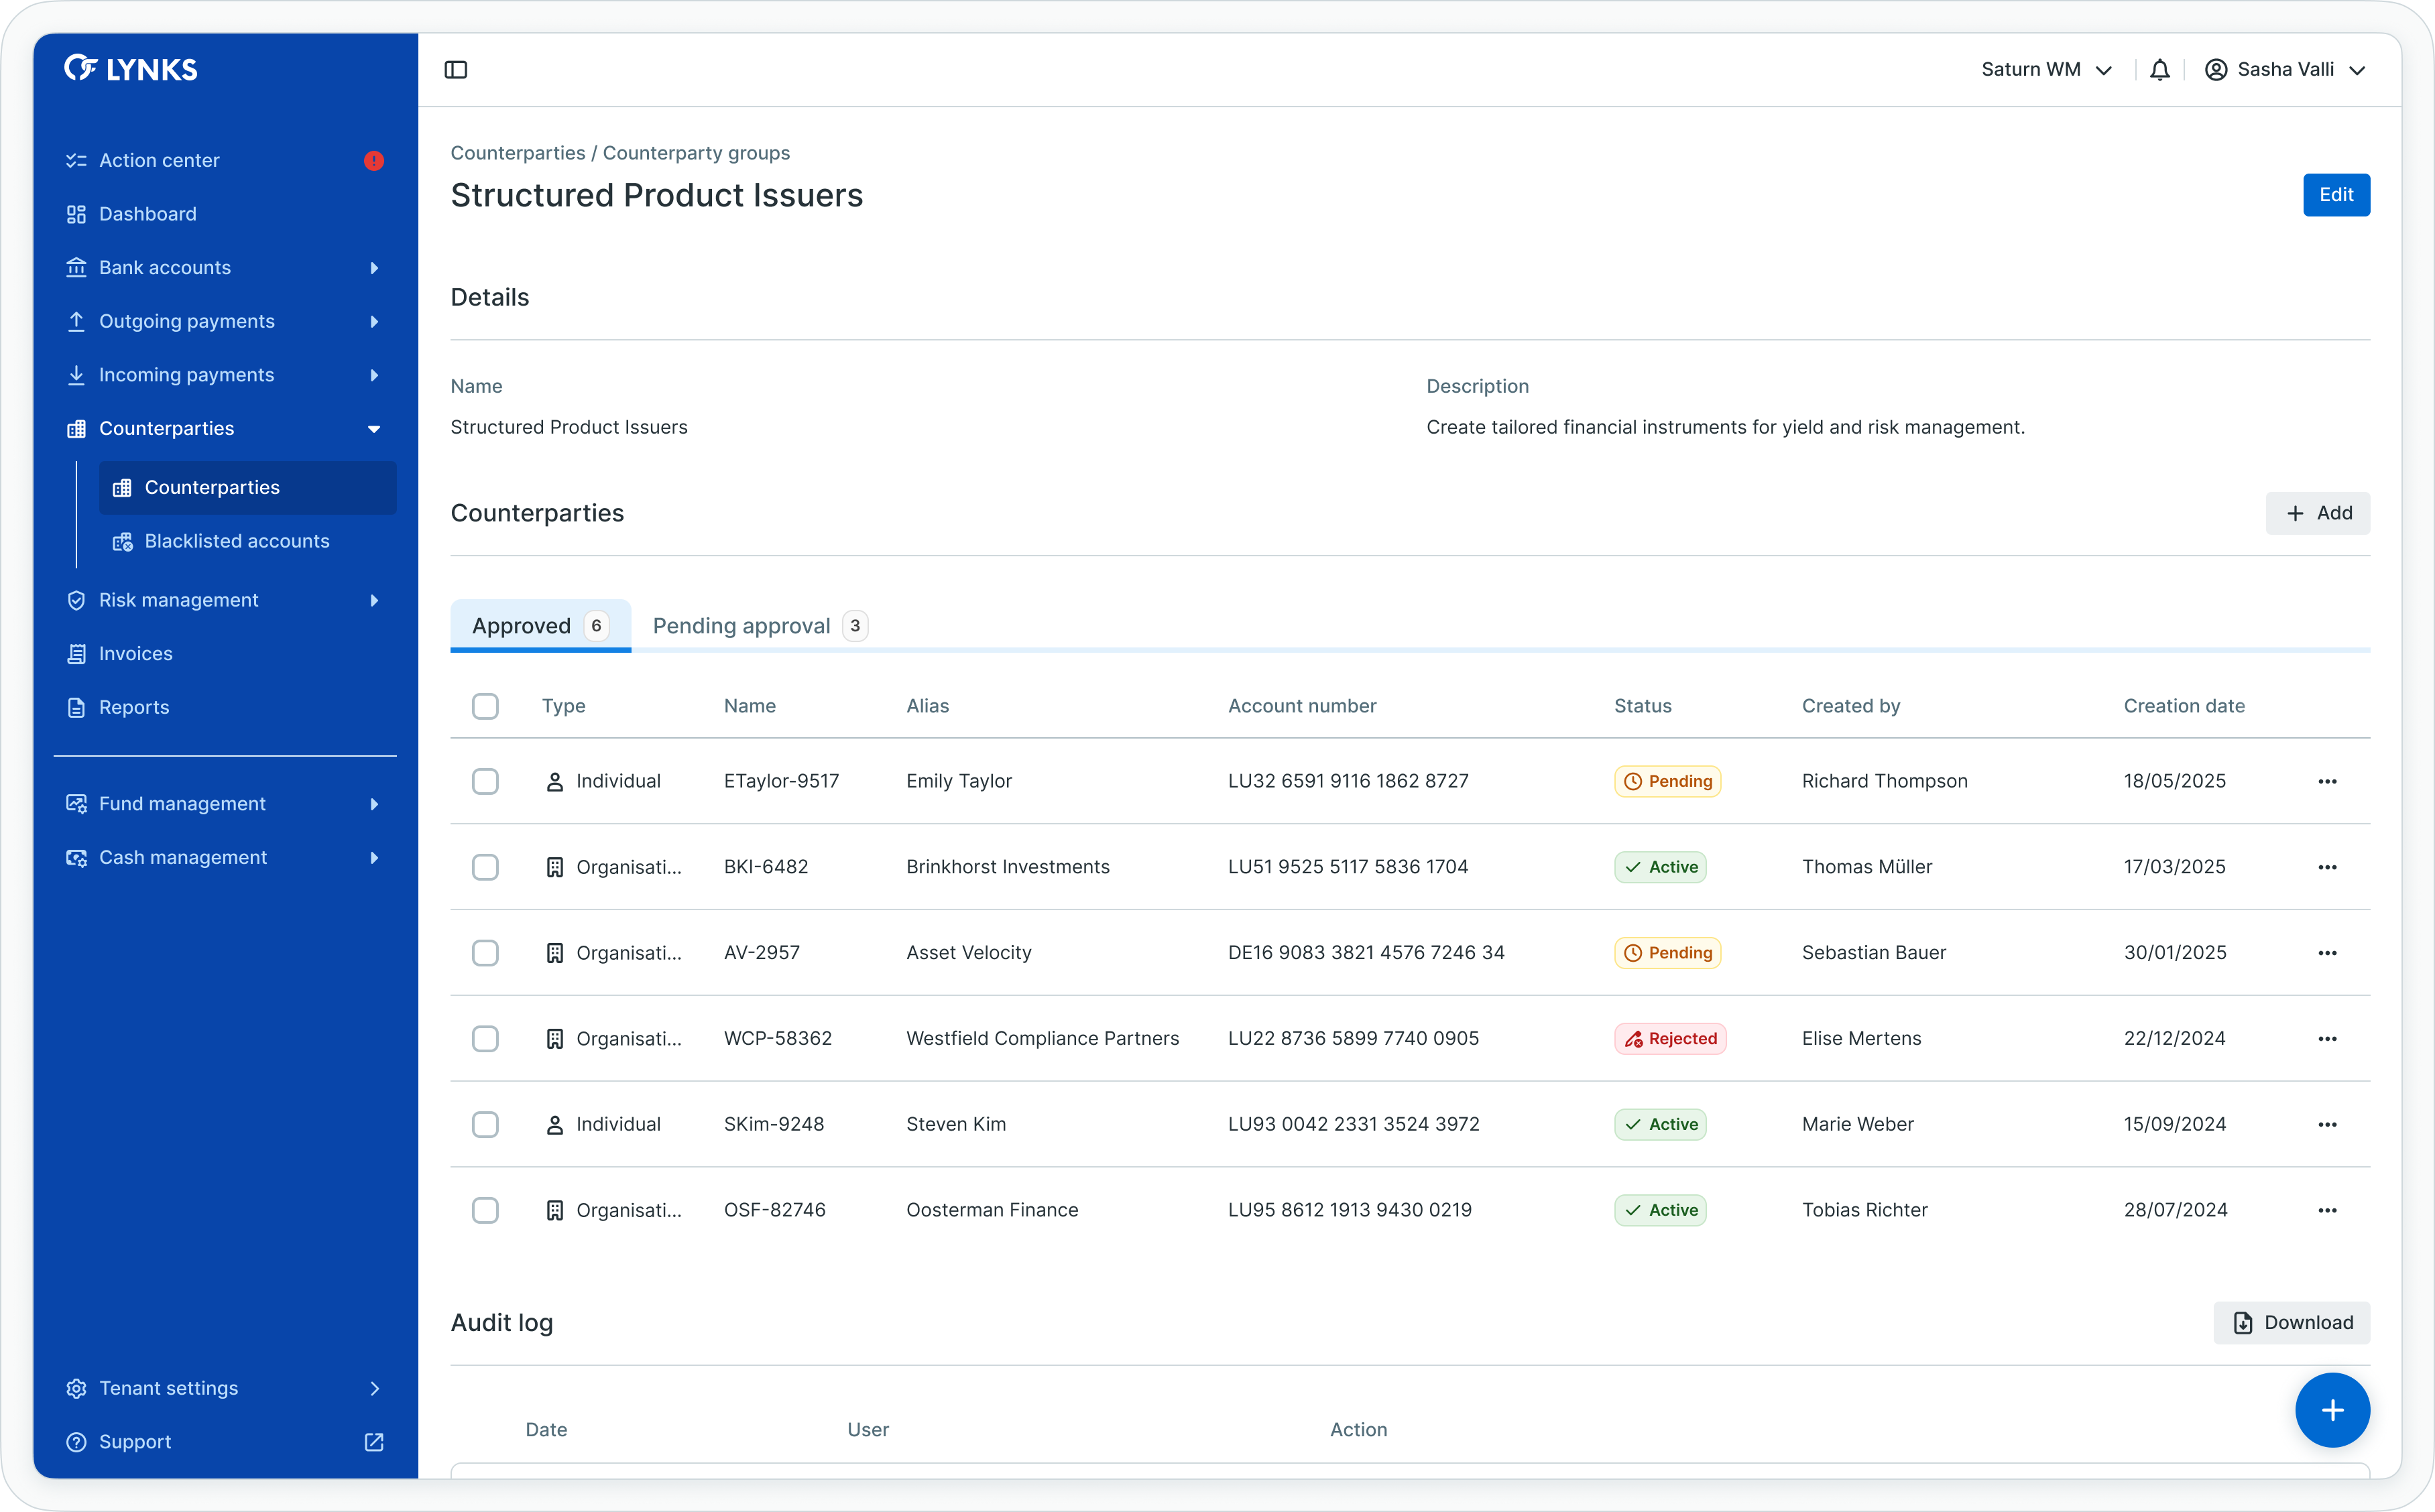
Counterparty group detail page
Managing group settings
To edit or delete groups:
Editing groups:
- Navigate to counterparty groups view
- Locate the group to modify
- Click overflow menu on group row
- Select Edit
- Modify group name or description
- Click Save
Deleting groups:
- Locate the group in groups view
- Click overflow menu
- Select Delete
- Confirm deletion
Deleting a group removes only the group structure - all counterparties remain in the system and lose only their group association.
Approval and verification workflows
Counterparties follow the four-eyes principle, requiring authorization from a user different from the creator before becoming available for payment use.
Counterparty approval process
New or modified counterparties require approval to ensure data accuracy and maintain internal controls.
Group membership approval
Finding counterparties pending approval:
Via Action Center:
- Navigate to Action Center from main menu
- Review the Counterparties section
- Check "With pending credit transfers" and "Without pending credit transfers" categories
- Click counters to view filtered lists of pending counterparties
Via Counterparties list:
- Navigate to Counterparties page
- Apply filter: Status = "Pending"
- Review counterparties awaiting approval
Approving counterparties
To authorize a counterparty:
- Click the pending counterparty row to open details
- Review all counterparty information carefully:
- Account details (IBAN, BIC, account holder name)
- Personal or organization information
- Risk level assignment
- Attached documentation
- Verify information accuracy against supporting documents
- Click the Approve or Authorize button
- Confirm approval
The counterparty status changes to "Active" and becomes available for use in credit transfer creation.
Rejecting counterparties
To reject a counterparty during approval:
- Open the pending counterparty details
- Click the Reject button
- Optionally provide rejection reason
- Confirm rejection
The counterparty status changes to "Rejected" and the creator receives notification. Rejected counterparties can be edited and resubmitted for approval.
Payment dependencyCounterparties with pending credit transfers are prioritized in the Action Center. Approving these counterparties unblocks associated payments awaiting counterparty authorization.
Counterparties list view
The counterparties list displays all beneficiaries in a comprehensive table format, showing essential information and enabling quick access to counterparty management actions.
Information displayed
The counterparties list table includes:
- Counterparty type indicator (Individual or Organization)
- Counterparty name (account holder)
- Account number (IBAN)
- BIC/SWIFT code
- Alias (if configured)
- Current status
- Risk level
- Screening status (if KYC screening enabled)
- Creation date and creator
Table functionality
The counterparties list supports standard table features:
- Column customization - Show, hide, reorder, and resize columns according to preferences
- Filtering - Apply filters by type, status, risk level, screening status, and more
- Search - Quick search across IBAN, names, aliases, and other fields
- Sorting - Sort by any column to organize counterparty information
- Bulk actions - Select multiple counterparties for batch operations
- Inline editing - Quick edit capability for specific fields directly in the list
- View persistence - Save customized table configurations for future sessions
Related functionalityFor detailed information about table features, filtering, and view customization, see Platform Navigation - Detailed guide to the head-up display, table views, filters, and search functionality.
Counterparty details view
Each counterparty has a dedicated details screen providing comprehensive information organized into expandable sections.
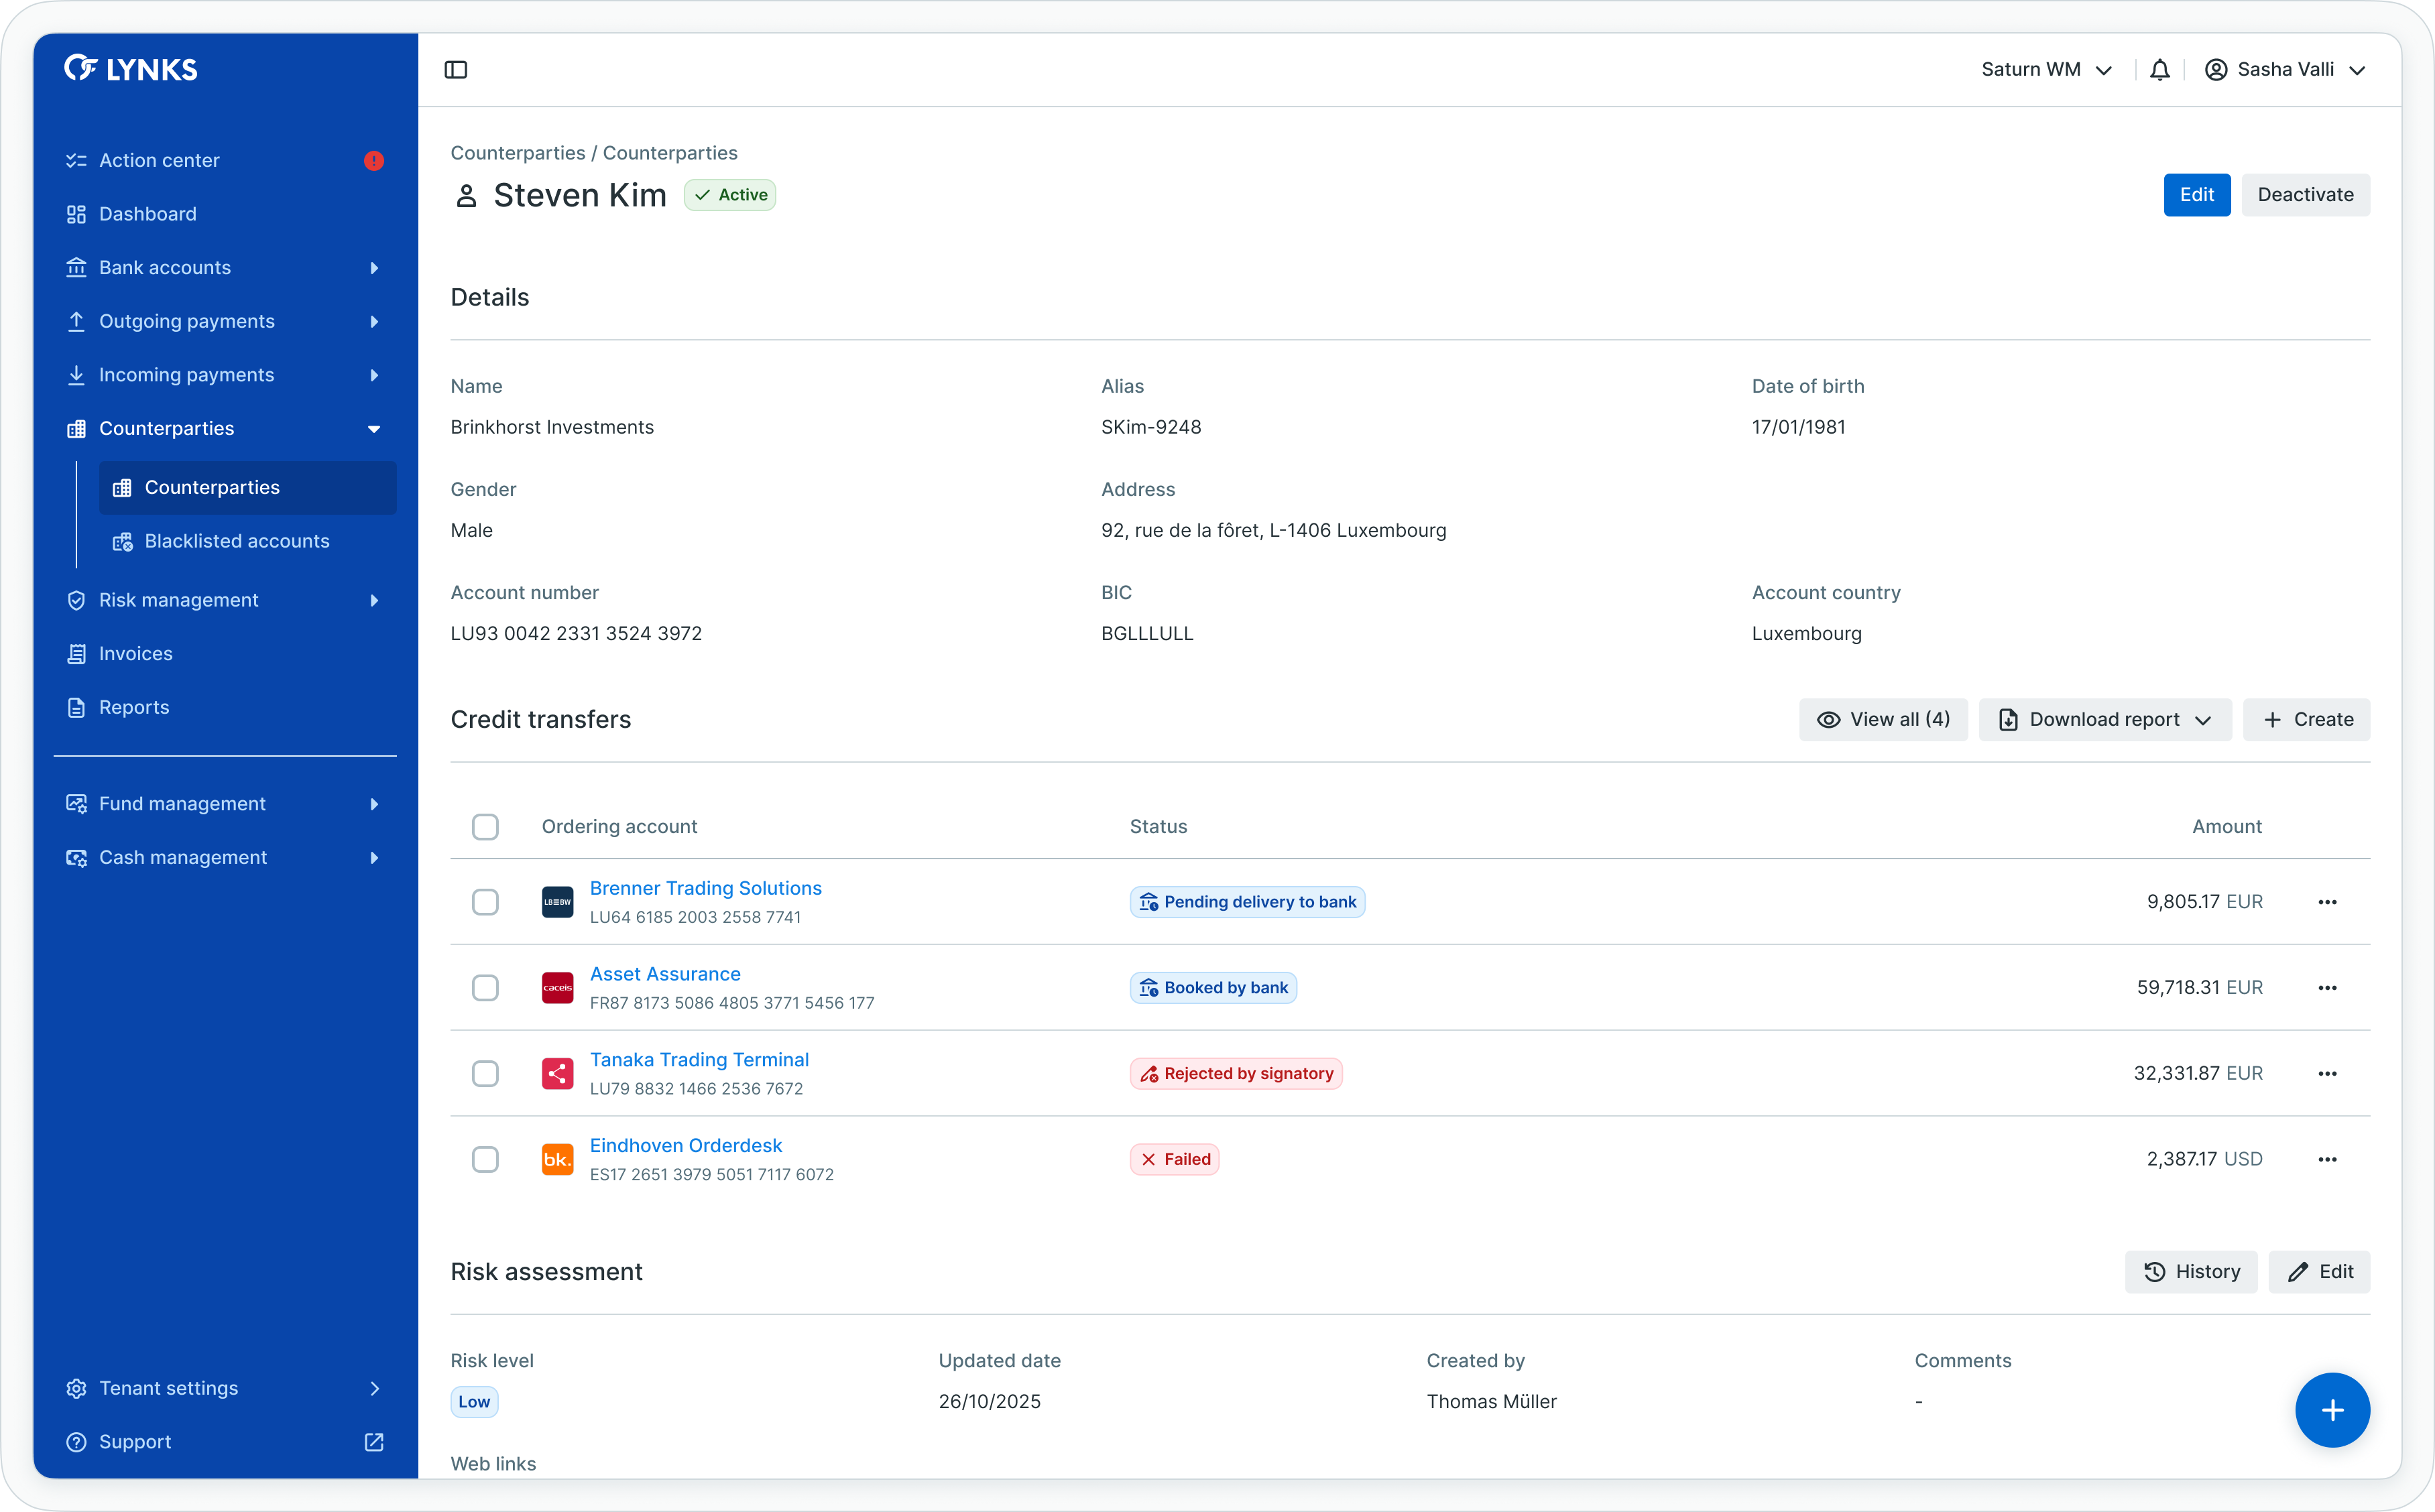
Counterparty details - part 1
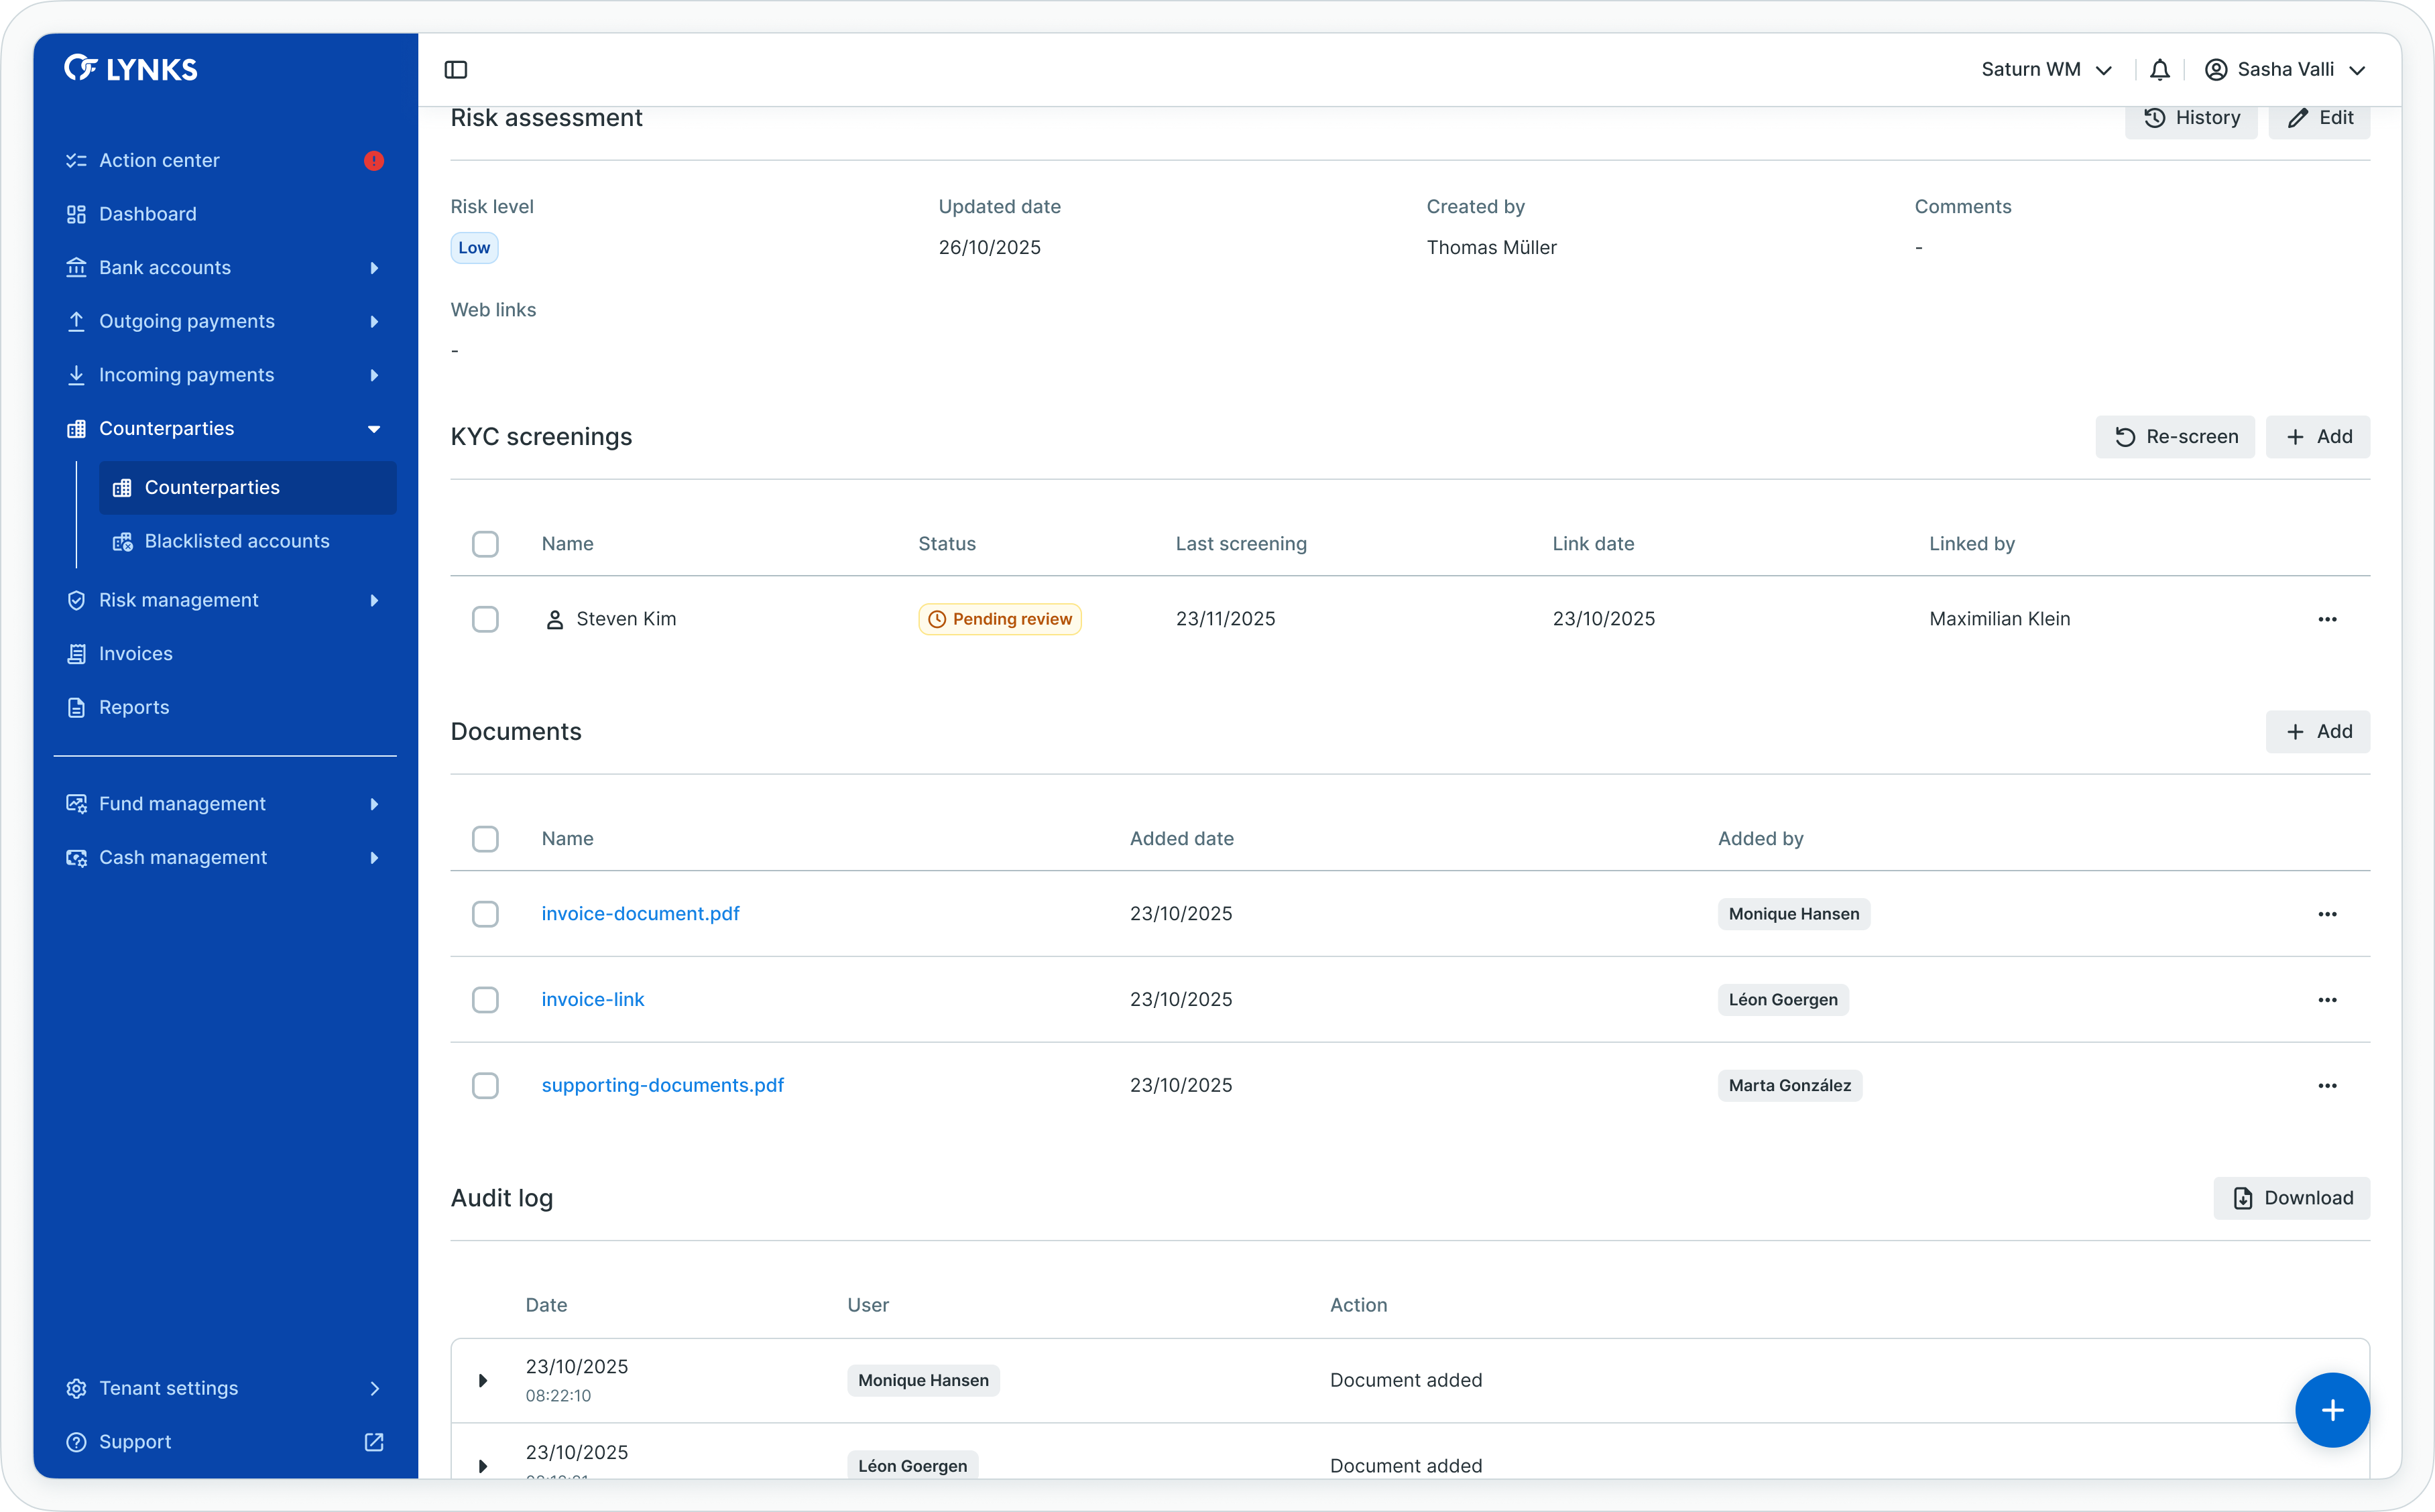
Counterparty details - part 2
Details screen sections
The counterparty details screen organizes information into:
Counterparty summary:
- Type, name, and status at the top
- Account information (IBAN, BIC)
- Alias and internal reference
- Risk level indicator
- Management action buttons
Associated payments:
- List of credit transfers initiated to this counterparty
- Payment status overview
- Quick navigation to payment details
- Ability to create new payments to this counterparty
Risk assessment section (when enabled):
- Current risk level assignment
- Risk assessment history
- Risk factors and scoring information
- Risk review dates and responsible users
KYC screening section (when enabled):
- Screening status and results
- Match information from screening providers
- Screening history and previous checks
- Actions to trigger manual screening
Documents section:
- Supporting documentation attached to counterparty
- Upload capability for contracts, agreements, identity documents
- Download access to attached files
- Document management actions
Audit log:
- Complete history of actions performed on counterparty
- Creation, modification, approval events
- Status transitions with timestamps
- User attribution for all actions
Managing counterparty status
Counterparties can be deactivated when no longer needed, preventing their use in new payments while maintaining historical records.
Deactivating counterparties
To deactivate a counterparty:
- Open the counterparty details
- Ensure the counterparty is in "Active" status
- Click the Deactivate button or find deactivate action in overflow menu
- Confirm deactivation
The counterparty status changes to "Inactive" and becomes unavailable for selection when creating new credit transfers.
Deactivation impactDeactivated counterparties cannot be used in new payments. Existing pending payments to deactivated counterparties may require attention or cancellation.
Reactivating counterparties
To reactivate a previously deactivated counterparty:
- Apply filter to show "Inactive" counterparties
- Open the counterparty details
- Click the Reactivate button
- Confirm reactivation
The counterparty returns to "Active" status and becomes available for payment use again.
Status definitions
Counterparties progress through defined statuses reflecting their position in the approval and lifecycle workflow.
Counterparty statuses
| Status | Definition |
|---|---|
| Pending | Counterparty created or modified, awaiting approval following four-eyes principle |
| Active | Counterparty approved and available for use in credit transfer creation |
| Rejected | Counterparty rejected during approval process, requiring modification and resubmission |
| Inactive | Counterparty deactivated, unavailable for use in new payments |
Best practices
Follow these recommendations to maximize the effectiveness of counterparty management:
- Verify account information - Double-check IBAN and BIC accuracy before saving to prevent payment failures
- Use descriptive aliases - Assign clear aliases to counterparties for easy identification during payment creation
- Assign appropriate risk levels - Properly categorize counterparties by risk to enable effective risk management and screening
- Attach supporting documentation - Include contracts, agreements, or identity documents to support approval processes
- Use counterparty groups strategically - Organize counterparties by business unit, purpose, or region for efficient management
- Review pending approvals regularly - Check Action Center for pending counterparty approvals to avoid blocking associated payments
- Maintain data currency - Regularly review and update counterparty information to ensure accuracy
- Leverage bulk import for large volumes - Use file upload for initial setup or large-scale updates to save time
- Validate files before upload - Check file formatting and data accuracy before bulk import to minimize validation errors
- Deactivate obsolete counterparties - Remove counterparties no longer needed to maintain clean data and reduce selection clutter
- Follow four-eyes principle strictly - Ensure different users create and approve counterparties to maintain control integrity
Related documentation
Explore related sections for more information:
- Platform Navigation - Detailed guide to the head-up display, table views, filters, and search functionality - Tables, filters, search, and view customization
- Permissions - Comprehensive explanation of access control and role-based permissions - Understanding access control and counterparty scoping
- Approvals - How approval workflows and signature processes function - Authorization workflows and four-eyes principle
- Action Center - Centralized task and approval management - Pending counterparty approvals
- Credit Transfers - Review payment details before approval - Using counterparties in payment creation
- Blacklisted Accounts - Manage prohibited accounts - Compliance-based account blocking
- Risk Management - KYC screening and risk assessment - Risk assessment and KYC screening
Support
For assistance with counterparty management or questions about beneficiary data, contact [email protected].
Updated about 2 months ago